Strawberry Crisp has been my go-to dessert for those moments when I crave something sweet, comforting, and utterly delicious, but don’t have hours to spend in the kitchen. There’s just something magical about how a few simple ingredients can transform into such a delightful treat. I remember the first time I made a Strawberry Crisp for a backyard barbecue; everyone raved about it, and I secretly smiled because it took me hardly any effort at all! It’s the kind of dessert that feels fancy and impressive, yet anyone can master it.
For me, a perfect Strawberry Crisp brings back memories of warm summer evenings, the kind where the air is still and the fireflies are just starting to blink. It’s a dessert that speaks of home, comfort, and effortless joy. The sweet, juicy strawberries bubbling underneath a golden, crumbly topping… it’s just pure bliss in every spoonful. It’s versatile enough for a weeknight treat, but special enough for company, and I can’t wait to share my tried-and-true recipe with you so you can experience that same simple pleasure.
Why You’ll Love This Strawberry Crisp
This Strawberry Crisp isn’t just another dessert; it’s a culinary hug in a baking dish! You’ll absolutely adore it for so many reasons. It’s incredibly easy to throw together, making it perfect for those busy weeknights or unexpected guests. The flavors are simply divine, a beautiful balance of sweet and slightly tart that keeps you coming back for more. Plus, it’s wonderfully versatile – you can adapt it to whatever berries you have on hand. It truly embodies comfort food at its finest, warm and inviting, ready to soothe your soul with every spoonful.
- Effortlessly simple to prepare, even for beginner bakers.
- A delightful balance of sweet strawberries and a buttery, crisp topping.
- Highly versatile; easily adapted with other fruits or spices.
- Provides ultimate comfort and warmth, especially when served fresh from the oven.
The Irresistible Charm of Strawberry Crisp
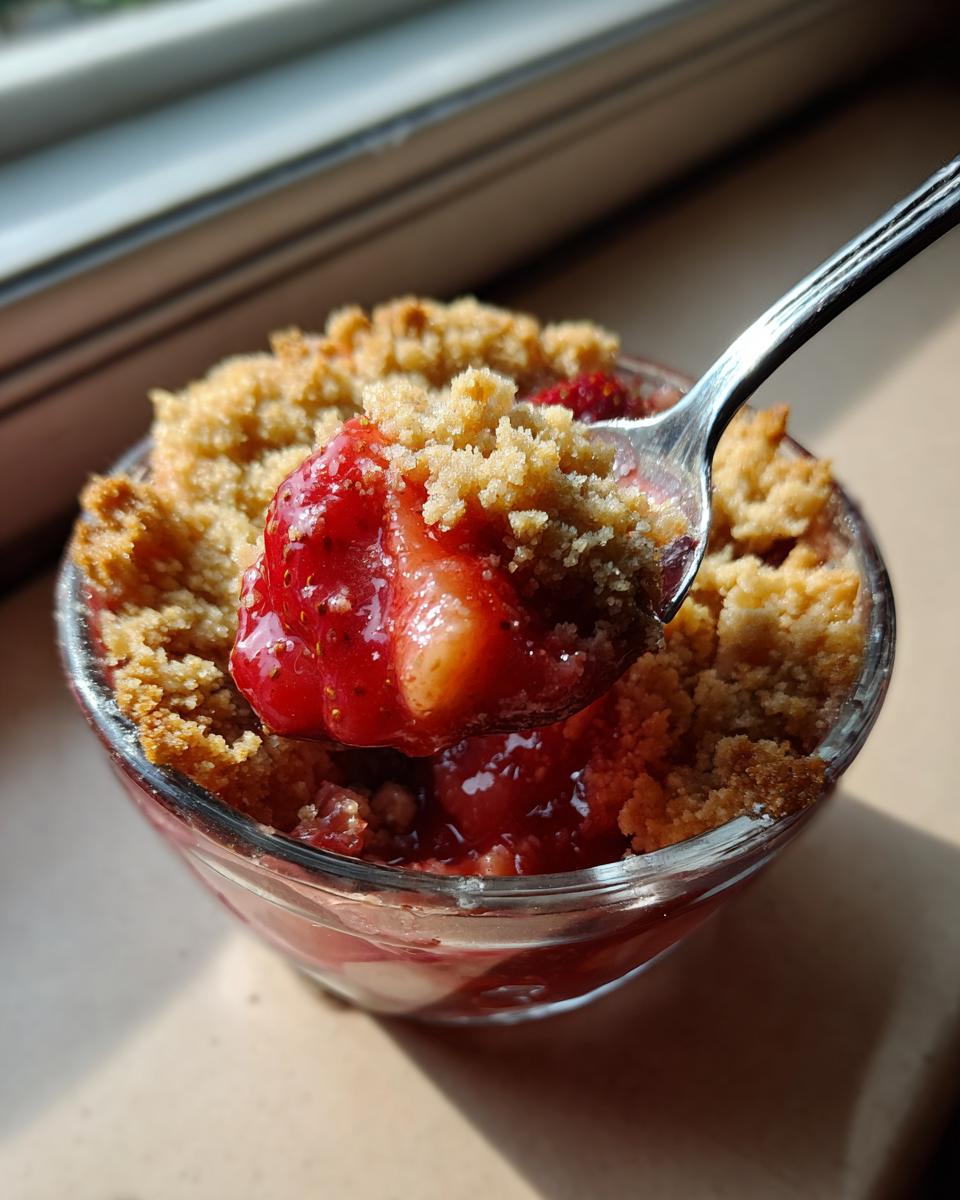
The magic of this Strawberry Crisp lies in its exquisite balance. The vibrant, juicy strawberries burst with a sweet-tart flavor that’s perfectly complemented by the rich, buttery, and slightly spiced oat topping. It’s a symphony of textures too – the soft, yielding fruit contrasting with the satisfying crunch of the crisp. This combination creates an experience that’s both deeply comforting and incredibly refreshing, making it truly irresistible.
Essential Ingredients for Your Strawberry Crisp
Making a truly delicious Strawberry Crisp starts with gathering the right ingredients. You don’t need anything fancy here, just good quality basics that will shine through in the finished dessert. For the filling, you’ll need fresh strawberries, granulated sugar, all-purpose flour, and a splash of lemon juice. For that irresistible topping, gather more all-purpose flour, rolled oats, packed light brown sugar, ground cinnamon, and unsalted butter. Each plays a vital role in creating that perfect balance of sweet, tart, and crunchy.
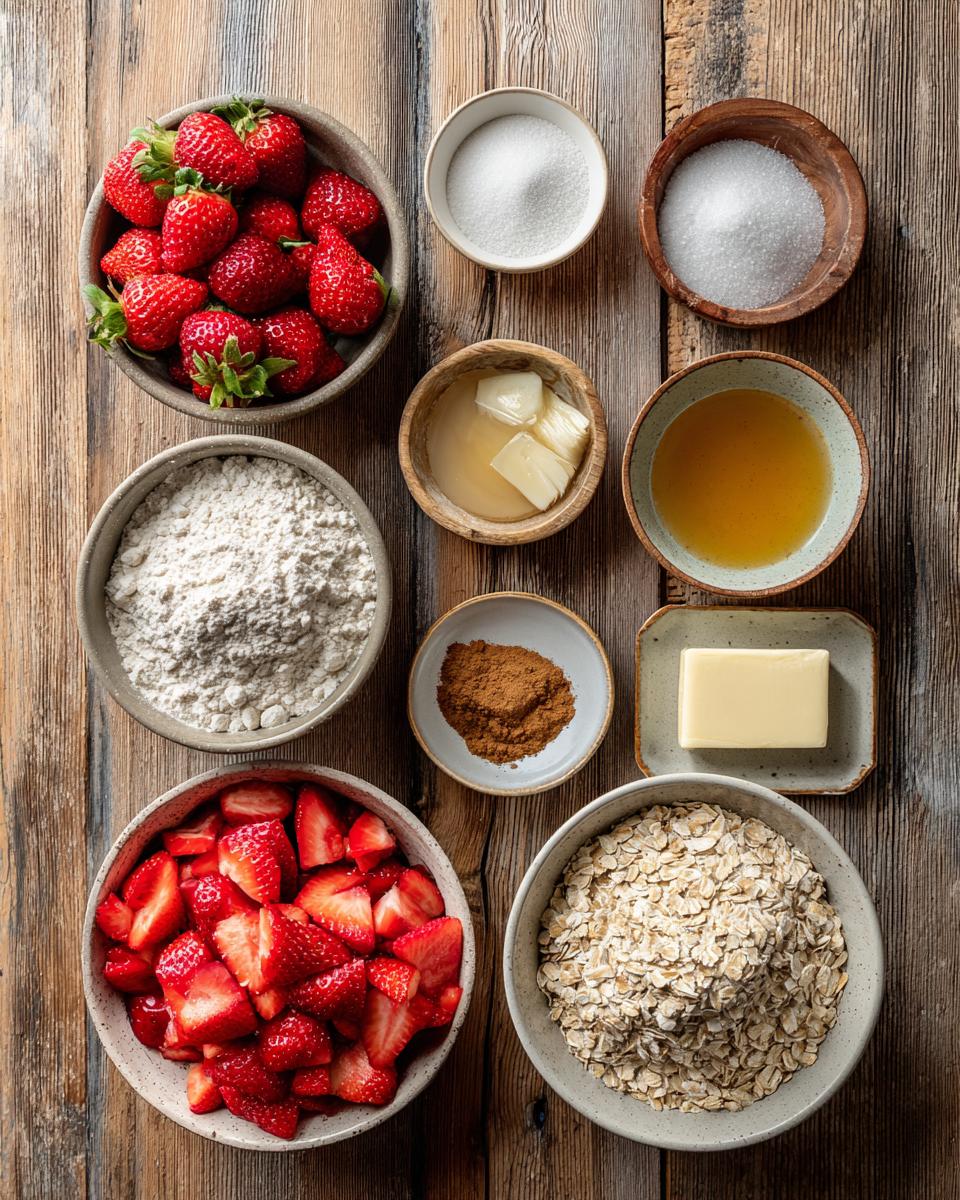
Fresh Strawberries for the Best Strawberry Crisp
The star of our Strawberry Crisp is, of course, the strawberries! Using fresh, ripe strawberries is absolutely key for the best flavor and texture. Look for berries that are bright red all over, plump, and firm to the touch. They should smell sweet and fragrant. Avoid any with white tops or soft spots. Hulled and sliced, they’ll release their beautiful juices into the crisp, creating that lovely, bubbly filling.
Pantry Staples for a Perfect Strawberry Crisp Topping
For that golden, crumbly topping that makes a Strawberry Crisp so irresistible, we rely on a few pantry staples. All-purpose flour provides the structure, while rolled oats add a wonderful chewiness and nutty flavor. Packed light brown sugar contributes a deep, caramel-like sweetness and helps create that signature crisp texture. A touch of ground cinnamon adds warmth and complements the berries beautifully. These dry ingredients, once combined with melted butter, form the perfect crumbly topping.
Step-by-Step Guide to Making Strawberry Crisp
Making this Strawberry Crisp is a breeze, and I’m going to walk you through each step so you can achieve perfect results every time. We’ll start with getting our oven ready, then move on to preparing the juicy strawberry filling, followed by crafting that irresistible golden topping, and finally, baking it to bubbly perfection. Don’t worry, I’ve broken it down into easy-to-follow instructions, anticipating any little questions you might have along the way. Just follow these steps, and you’ll have a warm, comforting Strawberry Crisp ready to enjoy in no time!
- Preheat your oven to 375°F (190°C). This ensures your crisp starts baking immediately and cooks evenly.
- Grab an 8×8 inch baking dish and set it aside for now.
- In a large bowl, combine your hulled and sliced strawberries, granulated sugar, 2 tablespoons of all-purpose flour, and the lemon juice. Toss everything gently until the strawberries are nicely coated.
- Pour this delicious strawberry mixture into your prepared 8×8 inch baking dish, spreading it out evenly.
- In a separate medium bowl, mix together the 1/2 cup all-purpose flour, rolled oats, packed light brown sugar, and ground cinnamon. Stir well to combine all the dry ingredients.
- Pour the melted unsalted butter over the oat mixture and mix it with a fork or your fingertips until it’s well combined and forms a crumbly texture.
- Evenly sprinkle this glorious oat topping over the strawberries in your baking dish.
- Bake for 30-35 minutes, or until the topping is beautifully golden brown and the strawberry filling is bubbly around the edges.
- Once out of the oven, let your Strawberry Crisp cool slightly before diving in. This allows the filling to set a bit and prevents you from burning your tongue!
Preparing the Strawberry Crisp Filling
For the heart of our Strawberry Crisp, we’re combining those beautiful sliced strawberries with granulated sugar, a touch of all-purpose flour, and a squeeze of lemon juice. The sugar helps to draw out the natural juices from the strawberries and sweetens them up. The flour acts as a thickener, ensuring your filling isn’t too runny, while the lemon juice brightens the flavor, balancing the sweetness and adding a little zing that truly makes the strawberries sing.
Crafting the Golden Strawberry Crisp Topping
The magic of a great Strawberry Crisp often lies in its topping. First, you’ll combine the dry ingredients: all-purpose flour for structure, rolled oats for a delightful chewiness, brown sugar for that deep, molasses-like sweetness, and cinnamon for warmth. Once those are well blended, you’ll pour in the melted butter. Use a fork or your fingers to mix until it forms lovely, irregular crumbs. This ensures you get that perfect mix of crunchy and tender in every bite.
Baking Your Delicious Strawberry Crisp
Once your Strawberry Crisp is assembled, it’s time for the oven! You’ll bake it at 375°F (190°C) for about 30-35 minutes. Keep an eye on it – you’re looking for a gorgeous golden-brown topping and for the strawberry filling to be visibly bubbly around the edges of the dish. This bubbling is your sign that the fruit is cooked through and wonderfully tender. After baking, resist the urge to dig in immediately; letting it cool slightly allows the flavors to meld and the filling to set just enough.
Tips for Success with Your Strawberry Crisp
Achieving a truly stellar Strawberry Crisp isn’t difficult, but a few pro tips can elevate it from good to absolutely amazing. First, always opt for the freshest, ripest strawberries you can find; their natural sweetness and juiciness are unparalleled. Don’t skimp on the lemon juice in the filling; it truly brightens the flavor and balances the sweetness. When making the topping, ensure your butter is melted but not hot, and mix it just until combined – overmixing can lead to a tough topping. Finally, trust your eyes and nose in the oven; a golden-brown topping and visibly bubbling fruit are your best indicators of a perfectly baked crisp.
Ensuring a Perfectly Bubbly Strawberry Crisp
You’ll know your Strawberry Crisp is perfectly cooked when the fruit filling is actively bubbling up around the edges and even through some of the topping. This bubbling indicates that the strawberries are tender and have released their delicious juices, mixing with the sugar and flour to create that luscious, warm filling. Don’t pull it out too early, or you might end up with undercooked fruit and a less flavorful crisp.
Variations and Serving Suggestions for Strawberry Crisp
While this Strawberry Crisp recipe is perfect as is, it’s also incredibly versatile! Feel free to get creative and make it your own. You can easily swap out some of the strawberries for other berries like blueberries, raspberries, or even blackberries for a mixed berry crisp. A pinch of cardamom or a tiny bit of ginger in the topping can add a lovely, unexpected warmth. And when it comes to serving, a warm Strawberry Crisp is simply divine with a scoop of vanilla ice cream, a dollop of fresh whipped cream, or even a drizzle of custard. It truly makes any meal feel special.
Creative Twists on Your Strawberry Crisp
Want to mix things up with your Strawberry Crisp? Try adding a handful of chopped rhubarb along with the strawberries for a delightful tartness, or incorporate some sliced peaches for a summery blend. A sprinkle of chopped nuts like pecans or walnuts into the topping can add an extra layer of crunch and flavor. Don’t be afraid to experiment with different fruit combinations to find your new favorite!
Storing and Reheating Your Strawberry Crisp
If you’re lucky enough to have any leftover Strawberry Crisp, storing it properly ensures you can enjoy it for a few more days. Once it has cooled completely to room temperature, cover the baking dish tightly with plastic wrap or aluminum foil and place it in the refrigerator. It will keep beautifully for up to 3 days. To reheat, simply pop individual servings in the microwave for 30-60 seconds, or for a crispier topping, warm the entire dish in an oven preheated to 350°F (175°C) for about 10-15 minutes, until heated through and bubbly again.
Frequently Asked Questions About Strawberry Crisp
I get a lot of questions about making the perfect Strawberry Crisp, and I love helping fellow home cooks master this delightful dessert. Here are some of the most common inquiries I receive, which will hopefully clear up any lingering doubts you might have about your own delicious Strawberry Crisp creation!
Can I use frozen strawberries for Strawberry Crisp?
Absolutely! You can definitely use frozen strawberries for your Strawberry Crisp. I recommend thawing them first and draining any excess liquid. This prevents your crisp from becoming too watery. You might also want to add an extra tablespoon of flour to the filling to help absorb any remaining moisture. The flavor will still be wonderfully delicious!
What can I serve with Strawberry Crisp?
Oh, the possibilities! My favorite way to enjoy a warm Strawberry Crisp is with a generous scoop of vanilla bean ice cream; the cold ice cream melting into the warm fruit is pure heaven. Other excellent choices include a dollop of freshly whipped cream, a drizzle of crème fraîche for a slight tang, or even a simple custard. Don’t be afraid to experiment!
How long does Strawberry Crisp last?
Your homemade Strawberry Crisp will typically last for about 3 days when stored properly in the refrigerator. Make sure it’s completely cooled before covering it tightly with plastic wrap or aluminum foil. While it’s best enjoyed fresh, the flavors can sometimes deepen a bit after a day, making leftovers a delightful treat!
Estimated Nutritional Information for Strawberry Crisp
For one delightful serving of this Strawberry Crisp, here’s an estimated nutritional breakdown: approximately 320 Calories, 12g Total Fat (7g Saturated Fat, 4g Unsaturated Fat), 25mg Cholesterol, 5mg Sodium, 50g Carbohydrates (4g Fiber, 35g Sugar), and 3g Protein. Please remember these values are estimates and can vary based on the specific brands and quantities of ingredients you use.
Share Your Strawberry Crisp Experience
I absolutely adore hearing from you all! If you try this Strawberry Crisp recipe, please come back and leave a comment below. Let me know what you thought, or if you made any fun adjustments! Don’t forget to rate the recipe, and if you share your beautiful creations on social media, be sure to tag me – I’d love to see your delicious Strawberry Crisp!
Print
Strawberry Crisp Recipe
- Total Time: 50 minutes
- Yield: 6 servings 1x
- Diet: Vegetarian
Description
A delightful strawberry crisp with a sweet and buttery topping, perfect for a simple dessert.
Ingredients
- 6 cups fresh strawberries, hulled and sliced
- 1/2 cup granulated sugar
- 2 tablespoons all-purpose flour
- 1 teaspoon lemon juice
- 1/2 cup all-purpose flour
- 1/2 cup rolled oats
- 1/2 cup packed light brown sugar
- 1/4 teaspoon ground cinnamon
- 1/4 cup unsalted butter, melted
Instructions
- Preheat your oven to 375°F (190°C).
- In a large bowl, combine the sliced strawberries, granulated sugar, 2 tablespoons of flour, and lemon juice. Toss gently to coat the strawberries.
- Pour the strawberry mixture into an 8×8 inch baking dish.
- In a separate medium bowl, combine the 1/2 cup flour, rolled oats, brown sugar, and cinnamon. Mix well.
- Pour the melted butter over the oat mixture and stir until combined and crumbly.
- Sprinkle the oat topping evenly over the strawberries.
- Bake for 30-35 minutes, or until the topping is golden brown and the strawberries are bubbly.
- Let cool slightly before serving.
Notes
- Serve warm with a scoop of vanilla ice cream.
- You can substitute other berries like blueberries or raspberries.
- Store leftovers in the refrigerator for up to 3 days.
- Prep Time: 15 minutes
- Cook Time: 35 minutes
- Category: Dessert
- Method: Baking
- Cuisine: American
Nutrition
- Serving Size: 1 serving
- Calories: 320
- Sugar: 35g
- Sodium: 5mg
- Fat: 12g
- Saturated Fat: 7g
- Unsaturated Fat: 4g
- Trans Fat: 0g
- Carbohydrates: 50g
- Fiber: 4g
- Protein: 3g
- Cholesterol: 25mg