There’s something magical about pulling a tray of golden, buttery garlic butter bread rolls from the oven. That first whiff of garlic and warm bread hitting your nose? Pure heaven. I’ve been baking these little clouds of joy for family dinners and holidays for years, and let me tell you – they disappear faster than you can say “seconds please!”
What makes these rolls special isn’t just their soft, pillowy texture (though that’s definitely part of it). It’s that moment when you brush them with garlic butter right after baking, watching the golden crust soak up all that garlicky goodness. I learned this trick from my mother, who swore by fresh garlic and real butter back when I was just learning to bake. Now my nieces and nephews beg me to make these whenever we have Sunday supper.
What started as a simple side dish has become our family’s most requested bread recipe. Whether we’re having roast chicken or just a big pot of soup, these garlic butter bread rolls turn any meal into something special. And the best part? They’re surprisingly easy to make – even if you’re not an experienced baker.
Why You’ll Love These Garlic Butter Bread Rolls
Trust me, once you try these rolls, you’ll wonder how you ever settled for plain dinner bread. Here’s why they’re a total game-changer:
- Cloud-like softness: That first bite? Pure pillowy perfection with just the right amount of chew.
- Foolproof recipe: Even my 12-year-old niece can make these (and she does – constantly!).
- Guaranteed crowd-pleaser: I’ve never brought these to a potluck without getting recipe requests.
- Endlessly customizable: Add cheese, herbs, or even a sprinkle of parmesan on top – they’re your blank buttery canvas!
Seriously, these rolls might just become your new signature dish. Mine still disappear faster than I can bake them!
Ingredients for Garlic Butter Bread Rolls
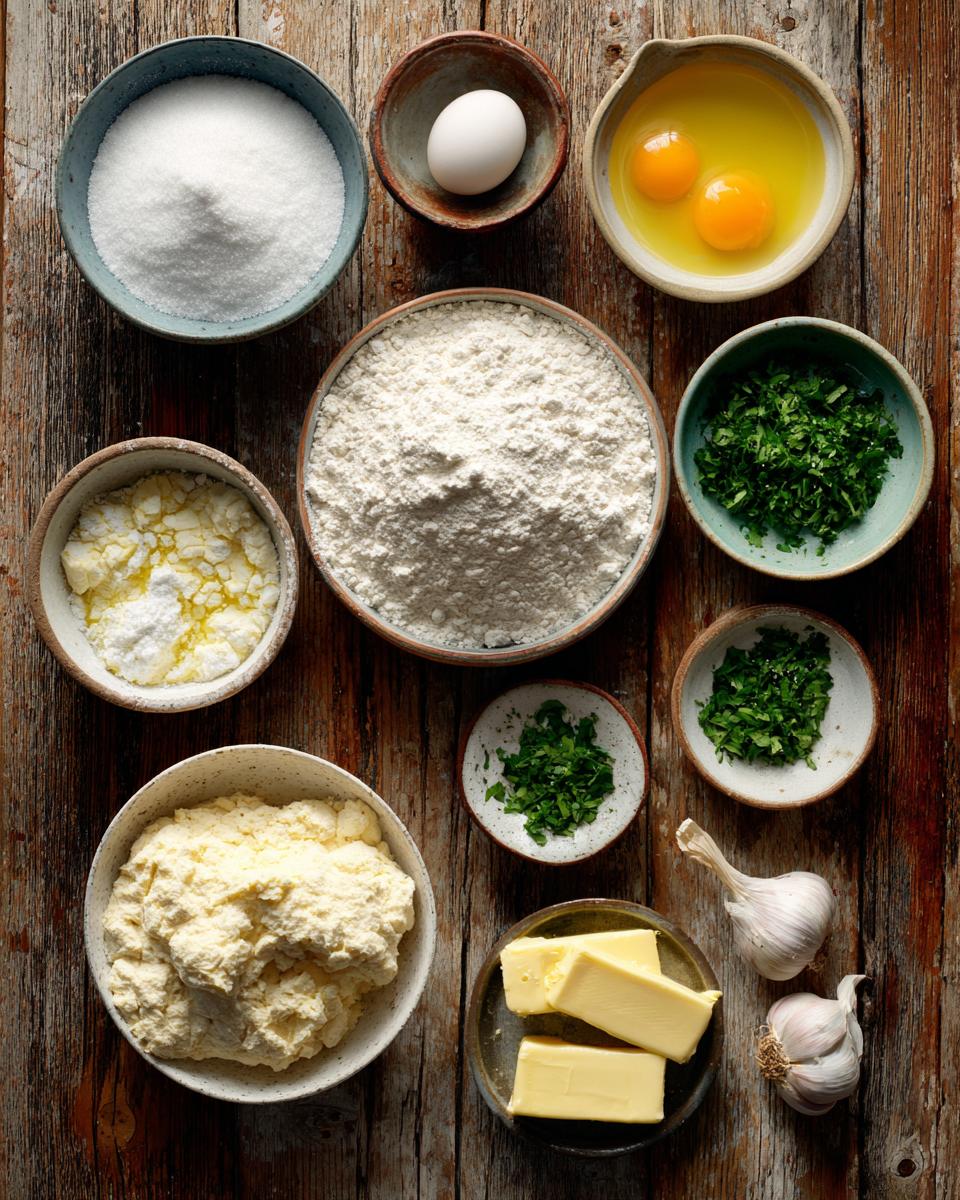
Gathering your ingredients is the first step to garlic butter bliss! I always set everything out before starting – it makes the process so much smoother. Here’s what you’ll need, broken down between the dough and that irresistible garlic butter topping:
For the Dough:
- 3 cups all-purpose flour (scooped and leveled) – This is your base. I’ve tried bread flour too, but all-purpose gives the perfect tender crumb.
- 1 tablespoon sugar – Just enough to feed the yeast without making the rolls sweet.
- 1 teaspoon salt – Crucial for balancing all those rich flavors.
- 1 packet (2 1/4 teaspoons) active dry yeast – The magic that makes these babies rise!
- 1 cup warm milk (110°F) – I use my finger to test – it should feel like warm bath water.
- 2 tablespoons melted butter – Real butter only – it makes all the difference in texture.
- 1 large egg – Adds richness and helps bind everything together.
For the Garlic Butter Topping:
- 3 tablespoons melted butter – Again, real butter! This is what creates that golden sheen.
- 2 tablespoons minced garlic (fresh preferred) – Please, please use fresh – the flavor is incomparable.
- 2 tablespoons chopped fresh parsley – Adds color and freshness to balance the rich butter.
See? Nothing too fancy, just quality ingredients combined the right way. That’s really the secret to amazing garlic butter bread rolls!
Equipment You’ll Need
You won’t need any fancy gadgets for these garlic butter bread rolls – just a few basic kitchen essentials that you probably already have:
- A large mixing bowl – Big enough for the dough to double in size during rising
- Baking sheet – I prefer rimmed ones to catch any butter drips
- Pastry brush – For that glorious garlic butter coating (a silicone one won’t lose bristles!)
- Measuring cups and spoons – Accuracy matters with baking
- Clean kitchen towel – To cover the dough while it rises
That’s it! No stand mixer required – though I won’t judge if you use one. I still love kneading by hand when I’m not in a hurry!
How to Make Garlic Butter Bread Rolls
Now for the fun part – turning these simple ingredients into golden, garlicky perfection! I’ve made this recipe so many times I could probably do it in my sleep, but I’ll walk you through each step carefully. The secret? Patience with the rising times and enthusiasm with the garlic butter brush!
Prepare the Dough
Start by mixing your dry ingredients – flour, sugar, salt and yeast – right in your big mixing bowl. Give them a quick whisk to combine. Then pour in the warm milk, melted butter, and crack in that egg. Now roll up your sleeves – it’s kneading time!
I like to mix with a wooden spoon first until it comes together, then turn it out onto a lightly floured surface. Knead for about 5 minutes, pushing the dough away with the heel of your hand, then folding it back. You’ll know it’s ready when it’s smooth, elastic, and springs back when poked – like a soft little pillow.
Pop the dough back in the bowl, cover it with a clean kitchen towel, and let it rise in a warm spot for 1 hour. I like to use my oven with just the light on – the gentle warmth is perfect. You’ll know it’s ready when it’s puffy and doubled in size.
Shape and Second Rise
Punch down that beautiful risen dough (so satisfying!) and turn it out onto your work surface. Here’s my trick for even rolls: divide the dough into 12 equal pieces. I sometimes weigh them to be precise – about 2 ounces each if you’re curious.
Shape each piece into a smooth ball by tucking the edges under – imagine you’re making little doughy presents! Arrange them on your baking sheet about an inch apart. They’ll cozy up to each other as they bake, creating those perfect pull-apart edges.
Cover them again and let rise for another 30 minutes – they should look nice and puffy. Meanwhile, preheat your oven to 375°F. This second rise is what gives them that heavenly light texture.
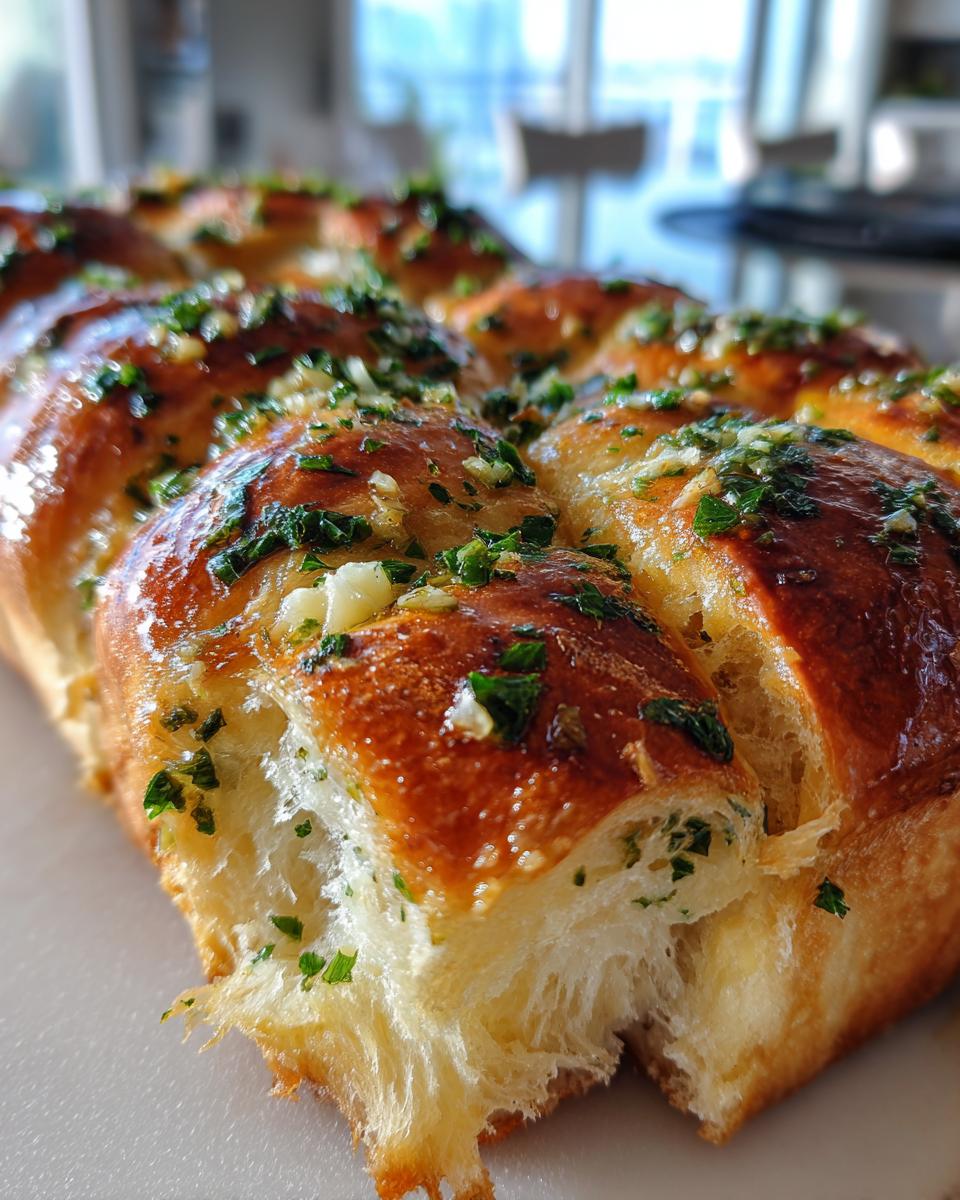
Bake and Brush with Garlic Butter
Slide those beauties into the oven and bake for 15-20 minutes. You’re looking for golden brown tops – if you tap one, it should sound hollow. While they bake, mix up your garlic butter topping: melt the butter, then stir in the minced garlic and parsley.
Here’s the magic moment: as soon as the rolls come out of the oven, brush them generously with the garlic butter. I mean really go for it – the warm rolls will drink it up! The heat activates the garlic flavor perfectly. That first bite through the crisp, buttery crust into the soft interior? Absolute bliss.
Let them cool just enough so you don’t burn your fingers, then dig in while they’re still warm. Fair warning – you might not want to share!
Tips for Perfect Garlic Butter Bread Rolls
After making hundreds of batches (no exaggeration!), I’ve picked up some foolproof tricks for garlic butter bread roll perfection:
- Test your yeast: If it doesn’t foam after 5 minutes in warm milk, toss it – old yeast equals flat rolls.
- Don’t over-knead: Stop when smooth and elastic – overworked dough turns tough.
- Cover during rises: A damp towel prevents drying out – crusty dough won’t rise properly.
- Brush while hot: Garlic butter absorbs best when rolls are fresh from the oven.
- Use room temp ingredients: Cold milk or eggs slow down yeast activity.
Follow these, and you’ll get bakery-worthy rolls every single time!
Variations and Substitutions
One of the best things about these garlic butter bread rolls is how easily you can tweak them! Here are my favorite ways to mix things up:
- Olive oil swap: Out of butter? Use good olive oil instead – it gives a lovely Mediterranean twist.
- Herb options: No fresh parsley? A teaspoon of dried Italian seasoning works beautifully.
- Cheese lovers: Fold in 1/2 cup shredded cheddar to the dough, or sprinkle parmesan on top before baking.
- Spice it up: Add a pinch of red pepper flakes to the garlic butter for a subtle kick.
The possibilities are endless – make them your own!
Serving and Storing Garlic Butter Bread Rolls
Oh, the joy of serving these warm garlic butter bread rolls! They’re perfect alongside creamy tomato soup or a hearty beef stew – really, anything that begs for a buttery bread companion. My family loves them so much we sometimes skip plates and just pass the basket around the table!
If by some miracle you have leftovers (it happens!), store them in an airtight container at room temperature for up to 2 days. To revive that just-baked magic, pop them in a 300°F oven for 5 minutes before serving. Though between you and me? They rarely last that long in my house!
Garlic Butter Bread Rolls Nutrition
Let’s be real – nobody eats garlic butter bread rolls for their health benefits! But if you’re curious about what’s in these little clouds of deliciousness, here’s the breakdown per roll:
- Calories: 180
- Fat: 6g (3.5g saturated)
- Carbohydrates: 27g
- Fiber: 1g
- Protein: 5g
- Sugar: 2g
- Sodium: 200mg
Now, I’m no nutritionist – these values are estimates based on standard ingredients. Your exact numbers might vary depending on how generously you brush on that garlic butter (and let’s be honest, I always go heavy!).
Pro tip from someone who’s eaten way too many of these: they’re best enjoyed warm from the oven, preferably with good company and zero guilt. Life’s too short to count every calorie when garlic butter is involved!
Common Questions About Garlic Butter Bread Rolls
Got questions about these garlic butter bread rolls? I’ve got answers! Here are the most common things people ask me when they’re making this recipe for the first time:
Can I use instant yeast instead of active dry yeast?
Absolutely! Instant yeast works great and actually makes the process a bit faster. Just skip the first rise – mix it right into your dry ingredients and proceed with shaping the rolls. They’ll still turn out fluffy and delicious, I promise!
Can I freeze these garlic butter bread rolls?
You sure can! I like to freeze them before baking for the best results. Just shape your rolls, place them on a baking sheet, and freeze until solid. Then transfer them to a freezer bag. When you’re ready to bake, let them thaw and rise at room temperature, then bake as usual. Fresh-baked rolls anytime!
What’s the best way to reheat leftover rolls?
Revive that just-baked magic by reheating them in a 300°F oven for about 5 minutes. If they’ve dried out a bit, wrap them in foil first. Pro tip: brush on a little extra garlic butter after reheating for that fresh-from-the-oven flavor!
Print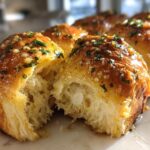
Garlic Butter Bread Rolls
- Total Time: 1 hour 50 minutes
- Yield: 12 rolls 1x
- Diet: Vegetarian
Description
Soft and fluffy bread rolls brushed with garlic butter for a flavorful twist.
Ingredients
- 3 cups all-purpose flour
- 1 tbsp sugar
- 1 tsp salt
- 1 packet (2 1/4 tsp) active dry yeast
- 1 cup warm milk
- 2 tbsp melted butter
- 1 egg
- 2 tbsp minced garlic
- 2 tbsp chopped parsley
- 3 tbsp melted butter (for brushing)
Instructions
- Mix flour, sugar, salt, and yeast in a bowl.
- Add warm milk, melted butter, and egg. Knead until smooth.
- Cover and let rise for 1 hour or until doubled in size.
- Divide dough into 12 equal parts and shape into rolls.
- Place rolls on a baking sheet and let rise for 30 minutes.
- Bake at 375°F (190°C) for 15-20 minutes until golden.
- Mix minced garlic, parsley, and melted butter. Brush over warm rolls.
Notes
- Use fresh garlic for best flavor.
- Let dough rise in a warm place for best results.
- Store leftovers in an airtight container.
- Prep Time: 1 hour 30 minutes
- Cook Time: 20 minutes
- Category: Bread
- Method: Baking
- Cuisine: American
Nutrition
- Serving Size: 1 roll
- Calories: 180
- Sugar: 2g
- Sodium: 200mg
- Fat: 6g
- Saturated Fat: 3.5g
- Unsaturated Fat: 2g
- Trans Fat: 0g
- Carbohydrates: 27g
- Fiber: 1g
- Protein: 5g
- Cholesterol: 25mg