Classic Peanut Butter Protein Balls have been my absolute savior in the kitchen, turning those mid-afternoon energy slumps into an opportunity for a delicious, guilt-free treat! As a busy home cook, I’m always on the hunt for snacks that are not only healthy but also incredibly easy to whip up. Let’s be honest, who has hours to spend baking when life is calling? That’s where these little gems come in. I started making these years ago when I needed something satisfying and protein-packed to get me through long days, and they quickly became a staple.
They’re the perfect grab-and-go solution, packed with good-for-you ingredients that keep me feeling full and energized. You won’t believe how simple it is to make a batch of these Classic Peanut Butter Protein Balls, and the best part? No baking required! Just a few minutes of mixing, rolling, and a little chill time, and you’ve got a fantastic snack ready for the week. Trust me, once you try them, you’ll wonder how you ever lived without them.
Why You’ll Love These Classic Peanut Butter Protein Balls
You’ll quickly discover why these Classic Peanut Butter Protein Balls are a game-changer for your snack routine. They’re designed for real life, offering maximum flavor and nutrition with minimal effort. I absolutely adore them because:
- Quick Prep: Seriously, they come together in about 15 minutes!
- No Baking Required: Just mix, roll, and chill – perfect for hot days or when you don’t want to turn on the oven.
- Customizable: Easily adapt them to your taste preferences and what you have on hand.
- Satisfying & Energizing: Packed with protein and healthy fats to keep you full and focused.
- On-the-Go Perfection: Grab one (or two!) for a quick breakfast, post-workout fuel, or an afternoon pick-me-up. These Classic Peanut Butter Protein Balls fit perfectly into any busy lifestyle.
The Allure of Classic Peanut Butter Protein Balls
The magic of these Classic Peanut Butter Protein Balls lies in that irresistible combination of creamy peanut butter and hearty oats, often with a hint of sweetness. It’s a flavor profile that’s comforting and deeply satisfying. Beyond taste, the protein content is key; it helps stabilize blood sugar and keeps hunger at bay, preventing those dreaded energy crashes. They’re a smart, delicious way to fuel your body.
Essential Ingredients for Classic Peanut Butter Protein Balls
Crafting the perfect batch of Classic Peanut Butter Protein Balls starts with selecting the right ingredients. Each component plays a vital role in achieving that ideal texture and flavor. I always make sure I have these staples on hand, as they’re the foundation for a truly delicious and satisfying snack. It’s not just about what you use, but the quality and form of each ingredient that truly makes a difference.
Pantry Staples for Your Classic Peanut Butter Protein Balls
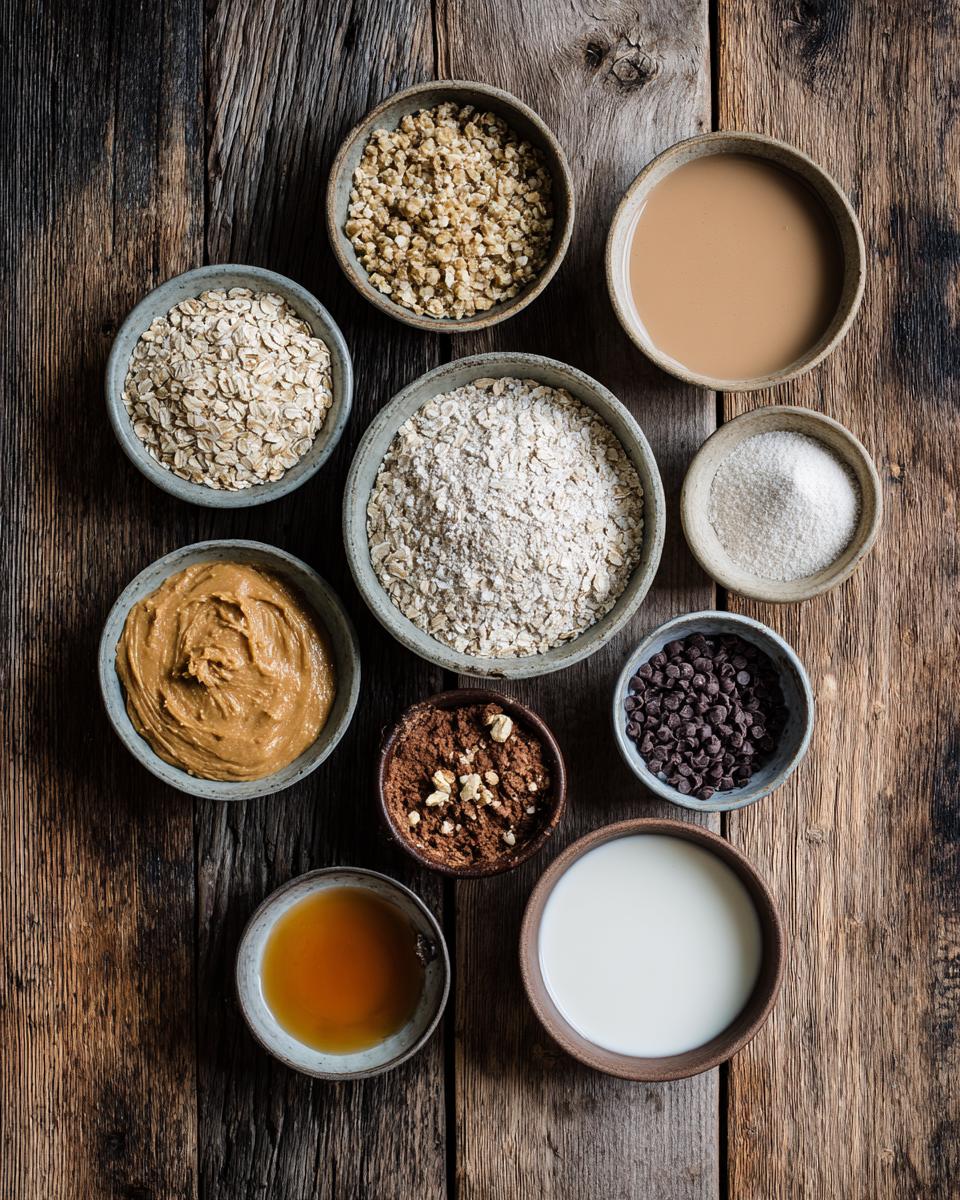
- 1 cup rolled oats (old-fashioned, not instant, as they provide better texture and absorb moisture perfectly)
- 1/2 cup creamy peanut butter (all-natural is my preference, but use your favorite for that classic flavor)
- 1/2 cup protein powder (vanilla or chocolate work wonderfully, adding both flavor and a protein boost)
- 1/3 cup honey or maple syrup (for natural sweetness and binding power)
- 1/4 cup milk or plant-based milk (to help bring everything together into a cohesive dough)
- Optional: 1/4 cup mini chocolate chips or chopped nuts (for an extra layer of flavor and crunch)
How to Make Classic Peanut Butter Protein Balls
Making Classic Peanut Butter Protein Balls is incredibly straightforward, almost foolproof! The beauty of this recipe is its simplicity; there are no complex techniques or fancy equipment required. Just a bowl, a spoon, and a little bit of patience while they chill. I’ll walk you through each step, sharing my personal tips to ensure your protein balls come out perfectly every single time, with that ideal chewy yet firm texture.
The key to success here is getting the mixture to the right consistency before you even start rolling. If it’s too sticky, you’ll have a mess; too dry, and they won’t hold together. Don’t worry, I’ve got you covered with advice on how to adjust it as you go. Once you get the hang of it, you’ll be whipping up batches of these delicious Classic Peanut Butter Protein Balls in no time!
Step-by-Step Guide to Perfect Classic Peanut Butter Protein Balls
First things first, grab a large mixing bowl. You’ll want plenty of room to get everything combined. Add your rolled oats, creamy peanut butter, protein powder, and either honey or maple syrup into the bowl. Give it a good initial stir with a sturdy spoon or spatula. It might look a little dry or crumbly at first, and that’s perfectly normal.
Next, gradually add the milk, a tablespoon at a time. Mix thoroughly after each addition. The goal here is to reach a consistency that’s firm enough to hold its shape when pressed, but still pliable. If you find it’s too dry, add a tiny bit more milk; if it’s too wet, a sprinkle of extra oats or protein powder will do the trick. Once your mixture is just right, stir in any optional add-ins like mini chocolate chips or chopped nuts.
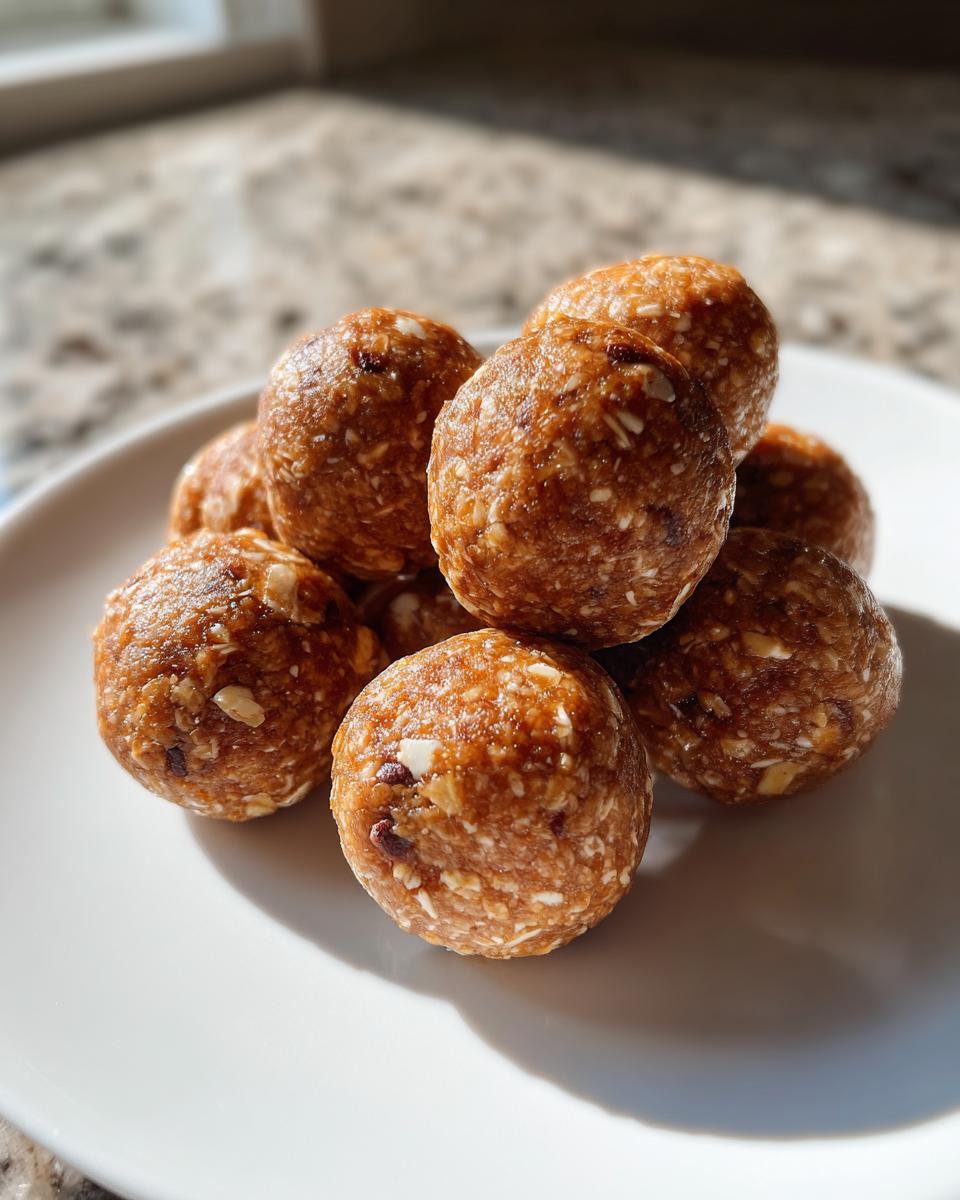
Now for the fun part: rolling! Take small portions of the mixture, about a tablespoon each, and roll them between your palms to form 1-inch balls. Place them on a plate or baking sheet lined with parchment paper. Finally, and this step is crucial for Classic Peanut Butter Protein Balls, pop them into the refrigerator for at least 30 minutes. This chilling time helps them firm up beautifully, making them easier to handle and giving them that satisfying, dense bite. Once firm, they’re ready to enjoy!
Tips for Success with Your Classic Peanut Butter Protein Balls
Achieving the perfect texture for your Classic Peanut Butter Protein Balls is key, and it mostly comes down to consistency. If your mixture feels too dry and crumbly, don’t hesitate to add a tiny bit more milk, half a tablespoon at a time, until it comes together. On the flip side, if it’s too sticky to roll, a little extra protein powder or a tablespoon of oats will help absorb that excess moisture.
Another crucial step is proper chilling. While it might be tempting to eat them right away, refrigerating your Classic Peanut Butter Protein Balls for at least 30 minutes (or even an hour!) makes a huge difference. This firms them up, preventing them from falling apart, and significantly improves their chewiness and overall texture. Patience here truly pays off!
Customizing Your Classic Peanut Butter Protein Balls
One of the best things about these Classic Peanut Butter Protein Balls is how incredibly adaptable they are! Don’t feel limited by the base recipe; think of it as a canvas for your culinary creativity. You can easily swap out the peanut butter for almond butter, cashew butter, or even sunflower seed butter if you have nut allergies or just want to try something new. Each will impart its own unique flavor profile.
Experiment with different protein powder flavors too! Chocolate protein powder makes a delicious mocha-flavored ball, while a plain or unflavored option allows the other ingredients to shine. For extra texture and nutrition, consider folding in chia seeds, flax seeds, finely chopped dried cranberries, or even a dash of cinnamon or pumpkin pie spice. The possibilities are endless for your Classic Peanut Butter Protein Balls!
Frequently Asked Questions About Classic Peanut Butter Protein Balls
I get a lot of questions about these Classic Peanut Butter Protein Balls, and I’m happy to share my insights! Here are some of the most common ones I hear:
Can I use a different nut butter? Absolutely! While the recipe specifies peanut butter for that “classic” taste, you can definitely swap it out. Almond butter, cashew butter, or even sunflower seed butter (for a nut-free option) work beautifully. Just make sure it’s a creamy variety, not super chunky, as this affects the texture of the protein balls.
How long do Classic Peanut Butter Protein Balls last? When stored in an airtight container in the refrigerator, these delicious protein balls will stay fresh for up to a week. They’re perfect for meal prepping and grabbing throughout your busy week. You can also freeze them for longer storage – just thaw them for a few minutes before enjoying.
Are these Classic Peanut Butter Protein Balls suitable for a specific diet? This recipe is naturally vegetarian and can easily be made vegan by using maple syrup instead of honey and a plant-based milk and protein powder. They’re also gluten-free if you ensure your rolled oats are certified gluten-free. For those watching sugar intake, you can reduce the amount of honey or maple syrup, or use a sugar-free alternative, though this might slightly affect the binding.
Why are my Classic Peanut Butter Protein Balls crumbly? Usually, this means your mixture is too dry. Add a tiny bit more milk, about half a tablespoon at a time, until the mixture comes together and holds its shape when pressed. Different protein powders and nut butters can affect the moisture content, so a little adjustment is sometimes needed.
Nutritional Information for Your Classic Peanut Butter Protein Balls
While these Classic Peanut Butter Protein Balls are packed with wholesome ingredients, please remember that the nutritional values provided are estimates. The actual calorie, protein, and fat content can vary significantly based on the specific brands of peanut butter, protein powder, and milk you choose. This information is intended as a general guide, not precise dietary advice, but it gives you a good idea of the goodness in each bite!
Enjoy Your Homemade Classic Peanut Butter Protein Balls
And there you have it! Your very own batch of delicious, wholesome Classic Peanut Butter Protein Balls. I truly hope you give this recipe a try and discover how easy and satisfying it is to make your own healthy snacks. Don’t forget to share your creations with me on social media – I love seeing your kitchen adventures! Please leave a comment below to let me know how they turned out or if you came up with any fantastic variations. Happy snacking, my friends!
Print
Peanut Butter Protein Balls
- Total Time: 45 minutes
- Yield: 12-15 balls 1x
- Diet: Vegetarian
Description
Quick and easy peanut butter protein balls for a healthy snack.
Ingredients
- 1 cup rolled oats
- 1/2 cup peanut butter
- 1/2 cup protein powder (vanilla or chocolate)
- 1/3 cup honey or maple syrup
- 1/4 cup milk or plant-based milk
- Optional: 1/4 cup mini chocolate chips or chopped nuts
Instructions
- Combine all ingredients in a large bowl.
- Mix until well combined and a dough forms.
- Roll the mixture into 1-inch balls.
- Place on a plate or baking sheet lined with parchment paper.
- Refrigerate for at least 30 minutes to firm up.
- Store in an airtight container in the refrigerator for up to a week.
Notes
- Adjust the amount of milk to achieve the desired consistency.
- If the mixture is too dry, add a little more milk. If too wet, add more oats or protein powder.
- These protein balls are great for meal prep and on-the-go snacking.
- Prep Time: 15 minutes
- Cook Time: 0 minutes
- Category: Snack
- Method: No-Bake
- Cuisine: American
Nutrition
- Serving Size: 1 ball
- Calories: 150
- Sugar: 8g
- Sodium: 70mg
- Fat: 8g
- Saturated Fat: 2g
- Unsaturated Fat: 5g
- Trans Fat: 0g
- Carbohydrates: 15g
- Fiber: 3g
- Protein: 10g
- Cholesterol: 0mg