Tuna Melts (Meal Prep Version) has been a lifesaver in my kitchen, transforming busy lunchtimes from a scramble into a simple, satisfying delight. I used to think tuna melts were strictly a spur-of-the-moment indulgence, but with a little planning, they become the ultimate convenient comfort food. This recipe isn’t just about throwing ingredients together; it’s about smart preparation that ensures you have a delicious, hot meal ready to assemble and cook in minutes, even on your most hectic days.
I’ve honed this approach over countless meal prep Sundays, seeking out recipes that truly deliver on both flavor and efficiency. My goal was to capture all the gooey, cheesy goodness of a classic tuna melt without the fuss, and this meal prep version absolutely nails it. You’ll find yourself looking forward to lunch all week long, knowing a warm, savory sandwich is just a quick sizzle away!
Why You’ll Love These Tuna Melts (Meal Prep Version)
The secret to perfect Tuna Melts (Meal Prep Version) lies in making your week a little bit easier and a whole lot tastier. This recipe doesn’t just promise deliciousness; it delivers on convenience and satisfaction in spades. I’ve designed it to take the stress out of lunch planning, ensuring you have a flavorful, comforting meal ready whenever hunger strikes. It’s truly a game-changer for anyone with a busy schedule but a craving for homemade goodness.
The Ultimate Convenience of Tuna Melts (Meal Prep Version)
Having your Tuna Melts (Meal Prep Version) prepped means no more scrambling for lunch ideas mid-week. You’ll simply grab your containers, assemble, and cook in minutes. It’s the ultimate time-saver, turning a potentially complex meal into a quick, easy weekday treat. Just a few steps from fridge to skillet, and you’re enjoying a warm, fresh sandwich.
Flavorful and Satisfying Tuna Melts (Meal Prep Version)
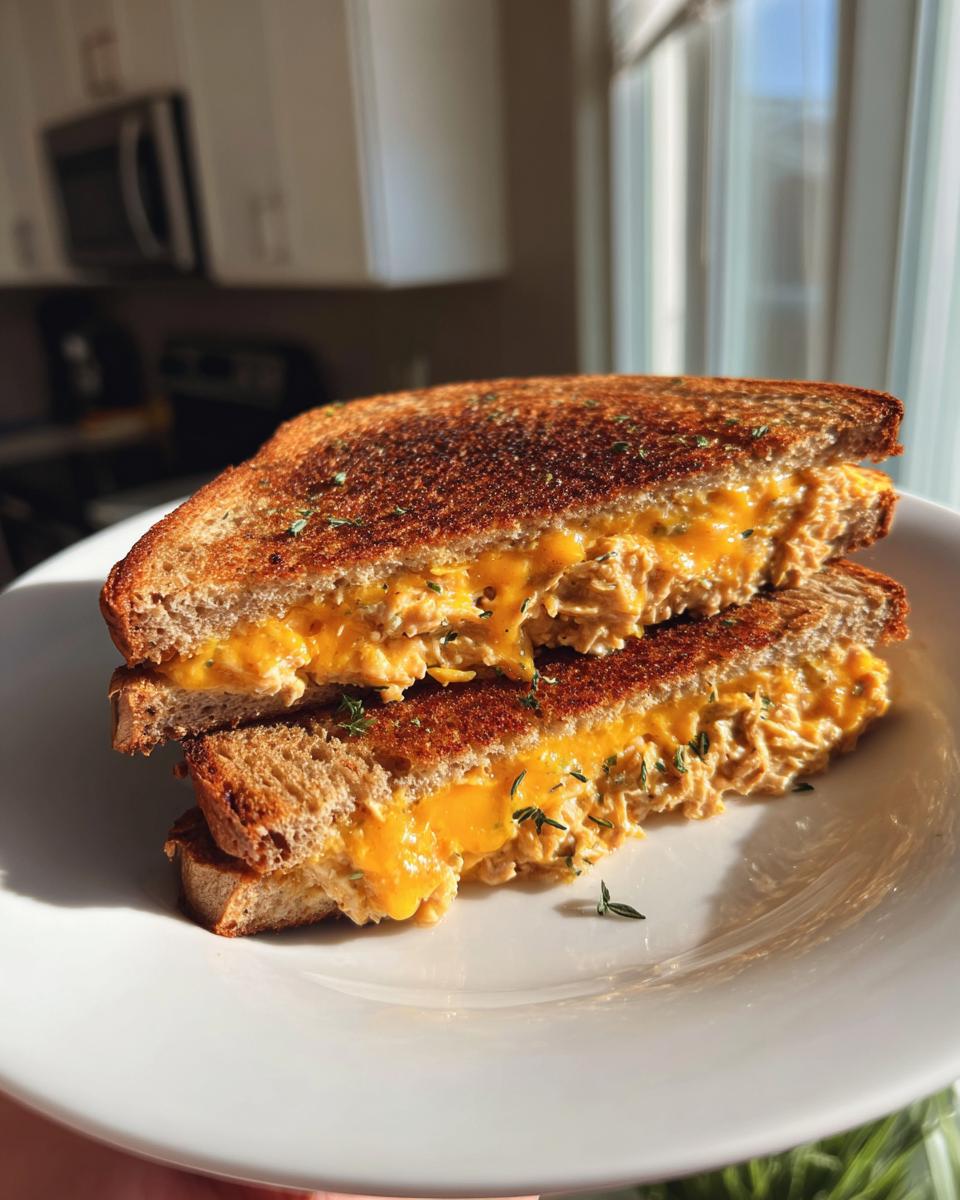
These Tuna Melts (Meal Prep Version) capture all the classic, comforting flavors you adore. The savory tuna salad, gooey melted cheese, and perfectly toasted bread create a harmonious bite that’s deeply satisfying. It’s a versatile dish too; while it’s fantastic on its own, it pairs beautifully with a simple soup or salad, making it a complete meal whenever you need it.
Healthy and Customizable Tuna Melts (Meal Prep Version)
Beyond convenience and taste, these Tuna Melts (Meal Prep Version) offer a great balance of protein and whole grains, making them a smart choice. Plus, they’re incredibly customizable! You can easily swap out cheese types, add in extra veggies, or even experiment with different spices in the tuna salad to make it perfectly suited to your taste and dietary needs.
Essential Ingredients for Your Tuna Melts (Meal Prep Version)
Making delicious Tuna Melts (Meal Prep Version) starts with understanding your ingredients. I’ve found that using quality components makes all the difference, even for something as seemingly simple as a tuna melt. You don’t need anything fancy, just fresh and flavorful items that work together to create that perfect comforting bite.
Each ingredient plays a crucial role, from the tuna that forms the base to the bread that holds it all together. I’ll walk you through exactly what you’ll need, including specific quantities and a few tips on preparation to ensure your meal prep goes smoothly.
Pantry Staples for Perfect Tuna Melts (Meal Prep Version)
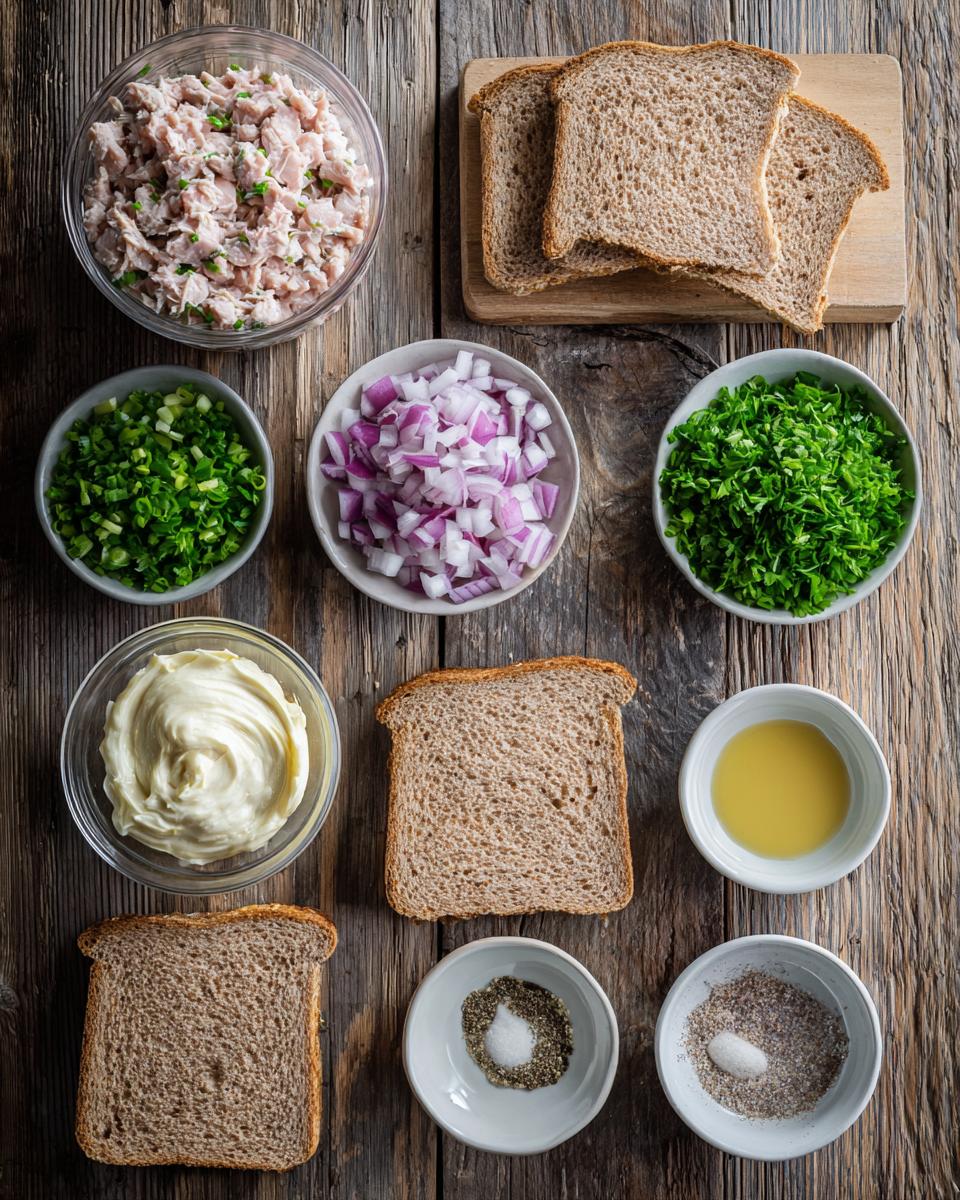
For the tuna, I always reach for two (5-ounce) cans of tuna in water, thoroughly drained. The “in water” part is key for a lighter, cleaner flavor profile. You’ll also need 1/4 cup of your favorite mayonnaise, 1 teaspoon of Dijon mustard for a little tang, and a dash of 1/4 teaspoon black pepper and 1/8 teaspoon salt to season everything just right.
Fresh Additions for Flavorful Tuna Melts (Meal Prep Version)
These fresh elements bring so much vibrancy to your Tuna Melts (Meal Prep Version). You’ll want 2 tablespoons of finely chopped celery – I like mine in tiny pieces for a subtle crunch. Then, 1 tablespoon of finely chopped red onion adds a nice, sharp bite without being overpowering. Finally, 1 tablespoon of fresh parsley, chopped, brightens everything up beautifully.
Bread and Cheese Choices for Tuna Melts (Meal Prep Version)
For the bread, eight slices of whole wheat bread are my go-to; it holds up well and offers a little extra fiber. And of course, you can’t have a tuna melt without the cheese! I recommend four slices of classic cheddar cheese for that iconic melty goodness. However, feel free to experiment with provolone or Swiss if you prefer a different flavor.
Step-by-Step Instructions for Tuna Melts (Meal Prep Version)
Making your Tuna Melts (Meal Prep Version) is incredibly straightforward, thanks to the magic of meal prep! The beauty of this recipe is that most of the work happens once, at the beginning of your week, leaving you with minimal effort when hunger strikes. I’ve broken down the process into clear, manageable steps, so you can confidently create delicious, ready-to-cook tuna melts. Pay attention to the packaging instructions – that’s key to keeping everything fresh and ready for quick assembly.
Preparing the Tuna Mixture for Your Tuna Melts (Meal Prep Version)
First things first, grab a medium-sized bowl. This is where all the magic happens! Add your thoroughly drained tuna, mayonnaise, finely chopped celery, finely chopped red onion, fresh parsley, Dijon mustard, black pepper, and salt. Now, take your time and mix everything together really well. You want all those flavors to combine beautifully, ensuring every bite of your Tuna Melts (Meal Prep Version) is packed with taste. Don’t rush this step; a well-mixed tuna salad is a happy tuna salad!
Packaging Your Tuna Melts (Meal Prep Version) for the Week
Once your tuna mixture is perfectly combined, it’s time for meal prep! Divide the entire tuna mixture evenly among four individual meal prep containers. These should be airtight to keep everything fresh. For the bread and cheese, pack your eight slices of whole wheat bread in a separate container or even a resealable bag. Do the same for your four slices of cheddar cheese, keeping them separate from the tuna mixture. This prevents the bread from getting soggy and the cheese from sticking to everything else.
Assembling and Cooking Your Tuna Melts (Meal Prep Version)
When you’re ready to enjoy your Tuna Melts (Meal Prep Version), preheat a non-stick skillet over medium heat. Place two slices of bread in the skillet. On one slice, spread half of one portion of your prepped tuna mixture, then top it with a slice of cheddar cheese. Place the other slice of bread right on top, pressing down gently. Cook for about 3-4 minutes per side, or until the bread is golden brown and the cheese is beautifully melted and gooey. Repeat this process with your remaining prepped ingredients. Enjoy your perfectly cooked, convenient tuna melt!
Tips for Success with Your Tuna Melts (Meal Prep Version)
To truly master these Tuna Melts (Meal Prep Version), a few simple tips can make all the difference. It’s not just about following the steps, but understanding the nuances that elevate a good sandwich to a great one. I’ve learned these through plenty of trial and error, and they’ll help you achieve that perfect balance of texture and taste every single time. Good ingredients and careful handling are your best friends here!
Achieving the Best Texture in Your Tuna Melts (Meal Prep Version)
The secret to a non-soggy, perfectly textured Tuna Melts (Meal Prep Version) starts with thoroughly draining your tuna. Seriously, squeeze out every last drop of water! Excess liquid will make your tuna salad watery and your bread soggy. Also, when mixing the tuna salad, blend until just combined. Overmixing can break down the tuna too much, leading to a pasty texture instead of a pleasant flakiness.
Flavor Boosters for Your Tuna Melts (Meal Prep Version)
While the recipe is fantastic as written, sometimes you want to kick things up a notch. For a little heat in your Tuna Melts (Meal Prep Version), don’t hesitate to add a small pinch of red pepper flakes to the tuna mixture. A dash of pickle relish can also add a delightful sweet and sour counterpoint. And for an herbal twist, try adding a little fresh dill alongside the parsley – it pairs beautifully with tuna!
Variations and Serving Suggestions for Tuna Melts (Meal Prep Version)
One of the best things about these Tuna Melts (Meal Prep Version) is how easily you can customize them to suit your mood or whatever you have on hand. Don’t be afraid to get creative! A simple swap can transform the entire flavor profile, keeping your meal prep exciting all week long. Plus, knowing what to serve alongside can elevate a simple sandwich into a satisfying meal.
Creative Twists for Your Tuna Melts (Meal Prep Version)
Beyond cheddar, try provolone or Swiss cheese for a different flavor profile in your Tuna Melts (Meal Prep Version). I sometimes add a thin slice of tomato or a crisp lettuce leaf right before cooking for an extra layer of freshness. For a bit more crunch, finely diced pickles or even some capers can be stirred into the tuna mixture. You can also experiment with a sprinkle of smoked paprika or a dash of hot sauce for a subtle kick!
What to Serve with Your Tuna Melts (Meal Prep Version)
To make your Tuna Melts (Meal Prep Version) a complete meal, I love serving them with a simple side. A classic pairing is a warm bowl of tomato soup, perfect for dipping! A fresh green salad with a light vinaigrette also provides a nice contrast. And of course, you can never go wrong with a handful of your favorite potato chips or some crunchy veggie sticks for that extra satisfying bite.
Storing and Reheating Your Tuna Melts (Meal Prep Version)
Proper storage is key to making your Tuna Melts (Meal Prep Version) truly shine as a meal prep hero. You want your components to stay fresh and ready for assembly, and you definitely want your reheated melt to taste just as good as a freshly made one. Follow these simple tips, and you’ll be enjoying delicious tuna melts all week long without any fuss.
Maximizing Freshness for Tuna Melts (Meal Prep Version)
To keep your Tuna Melts (Meal Prep Version) at their best, always store the prepared tuna mixture in an airtight container in the refrigerator. It will stay fresh for up to 3 days. The bread and cheese should be stored separately, either in their original packaging or in sealed bags/containers at room temperature or in the fridge, depending on your climate. Keeping everything separate prevents sogginess and maintains optimal texture.
Reheating Instructions for Tuna Melts (Meal Prep Version)
The best way to reheat your Tuna Melts (Meal Prep Version) is by assembling and cooking them fresh, right before eating. This ensures a crispy exterior and gooey melted cheese. Simply follow the cooking instructions provided for preheating a skillet and toasting your sandwich. Avoid pre-assembling and reheating an entire cooked sandwich, as it can get soggy and the cheese won’t re-melt as nicely.
Common Questions About Tuna Melts (Meal Prep Version)
I get a lot of questions about meal prepping, and Tuna Melts (Meal Prep Version) are no exception! It’s natural to wonder about storage, substitutions, and how to get the most out of your prep. Here are some of the most common inquiries I receive, along with my best advice to ensure your tuna melts are always a success.
Can I freeze the tuna mixture for Tuna Melts (Meal Prep Version)?
While you can technically freeze the tuna mixture for your Tuna Melts (Meal Prep Version), I generally don’t recommend it. Mayonnaise-based salads, when frozen and thawed, can sometimes separate and become watery, affecting the texture and overall appeal. The celery and onion can also lose some of their crispness. It’s best enjoyed fresh from the fridge within a few days.
How long do Tuna Melts (Meal Prep Version) last in the refrigerator?
The prepared tuna mixture for your Tuna Melts (Meal Prep Version) will last safely in an airtight container in the refrigerator for up to 3 days. This makes it perfect for a few days of quick lunches! Always make sure to keep the bread and cheese separate until you’re ready to assemble and cook to prevent sogginess.
What are some dairy-free alternatives for Tuna Melts (Meal Prep Version)?
Absolutely! You can easily make your Tuna Melts (Meal Prep Version) dairy-free. For the mayonnaise, simply swap it out for your favorite vegan mayonnaise. For the cheese, there are many excellent dairy-free cheddar slices available on the market now that melt beautifully. Just choose a brand you trust for flavor and meltability, and you’ll still get that classic gooey goodness!
Estimated Nutritional Information for Your Tuna Melts (Meal Prep Version)
Each serving of these Tuna Melts (Meal Prep Version) is estimated to contain around 350 calories, with 15g of fat (5g saturated, 10g unsaturated), 30g carbohydrates, 4g fiber, 5g sugar, 25g protein, 700mg sodium, and 40mg cholesterol. Please remember, these values are estimates and can vary based on the specific brands and quantities of ingredients you use.
Share Your Tuna Melts (Meal Prep Version) Experience
I’d love to hear how these Tuna Melts (Meal Prep Version) fit into your busy week! Did you try any fun variations? What’s your favorite side dish to pair them with? Drop a comment below, rate the recipe, or even better, share a photo of your delicious creations on social media and tag me! Happy cooking!
Print
Meal Prep Tuna Melts
- Total Time: 25 minutes
- Yield: 4 servings 1x
- Diet: Low Calorie
Description
This recipe offers a convenient, meal-prep friendly version of classic tuna melts. Prepare ahead for quick assembly and enjoy a satisfying, savory meal.
Ingredients
- 2 (5 ounce) cans tuna in water, drained
- 1/4 cup mayonnaise
- 2 tablespoons finely chopped celery
- 1 tablespoon finely chopped red onion
- 1 tablespoon chopped fresh parsley
- 1 teaspoon Dijon mustard
- 1/4 teaspoon black pepper
- 1/8 teaspoon salt
- 8 slices whole wheat bread
- 4 slices cheddar cheese
Instructions
- In a medium bowl, combine the drained tuna, mayonnaise, celery, red onion, parsley, Dijon mustard, black pepper, and salt. Mix well.
- Divide the tuna mixture evenly into four meal prep containers.
- In separate small containers or bags, pack 8 slices of whole wheat bread and 4 slices of cheddar cheese.
- When ready to eat, preheat a non-stick skillet over medium heat.
- Place two slices of bread in the skillet. Top one slice with half of the tuna mixture and a slice of cheddar cheese.
- Place the other slice of bread on top, pressing gently.
- Cook for 3-4 minutes per side, or until the bread is golden brown and the cheese is melted.
- Repeat with the remaining ingredients.
Notes
- Store prepared tuna salad in the refrigerator for up to 3 days.
- For a spicier kick, add a pinch of red pepper flakes to the tuna mixture.
- Other cheese types like provolone or Swiss can be used.
- Consider adding a slice of tomato or a lettuce leaf when assembling.
- Prep Time: 15 minutes
- Cook Time: 10 minutes
- Category: Sandwich
- Method: Stovetop
- Cuisine: American
Nutrition
- Serving Size: 1 sandwich
- Calories: 350
- Sugar: 5g
- Sodium: 700mg
- Fat: 15g
- Saturated Fat: 5g
- Unsaturated Fat: 10g
- Trans Fat: 0g
- Carbohydrates: 30g
- Fiber: 4g
- Protein: 25g
- Cholesterol: 40mg