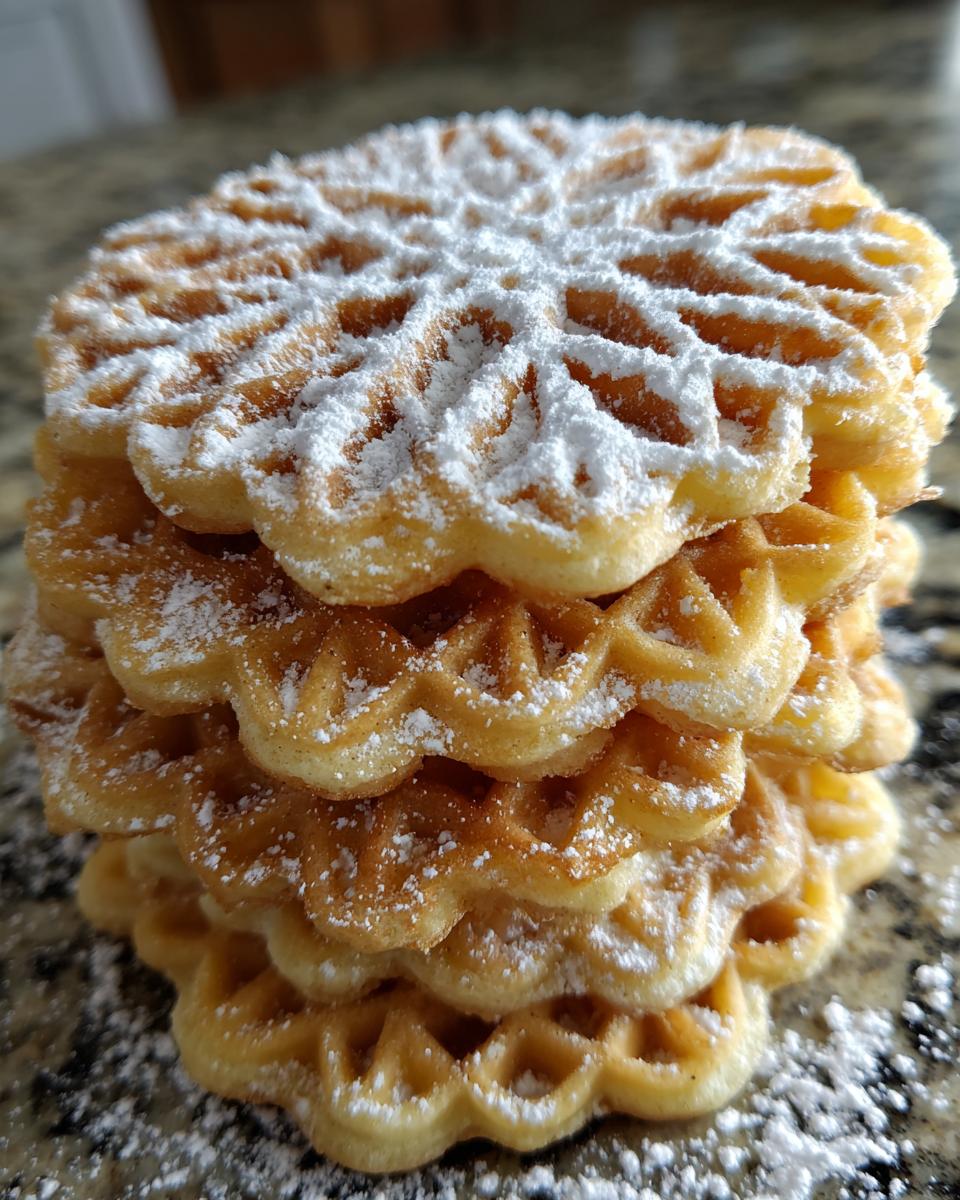
Pizzelle have been a staple in my family’s holiday celebrations for as long as I can remember. The delicate, crispy Italian waffle cookies instantly transport me back to my grandmother’s bustling kitchen, the sweet scent of vanilla and anise filling the air. There’s something truly magical about these simple cookies – they’re not just a treat, they’re a tradition. I’ve spent countless hours perfecting my own Pizzelle recipe, trying different flours, varying the extracts, and learning the nuances of the pizzelle iron. My first attempts were, shall we say, a learning curve, but through trial and error, I’ve finally landed on a recipe that consistently delivers those perfectly crisp, beautifully patterned cookies. These Pizzelle are wonderfully versatile; delicious on their own, dusted with powdered sugar, or even shaped into cones for a special dessert. They truly embody the charm of traditional Italian baking.
Why You’ll Love These Pizzelle
Making Pizzelle is more than just baking; it’s an experience that brings joy and delicious results. Here’s why you’ll fall in love with this recipe:
- Surprisingly Easy: Don’t let their elegant appearance fool you! With a pizzelle iron, these cookies come together quickly and with minimal fuss, making them perfect for bakers of all skill levels.
- Irresistibly Delicious: Light, crisp, and delicately sweet, these Pizzelle melt in your mouth. The classic vanilla and anise flavors are simply divine.
- Incredibly Versatile: Enjoy them plain, dust them with powdered sugar, or get creative! Shape them into cones or cups while warm for a unique dessert presentation.
- A Touch of Tradition: There’s a heartwarming charm in making these traditional Italian cookies. They’re perfect for holidays, special occasions, or just a cozy afternoon treat.
Essential Ingredients for Perfect Pizzelle
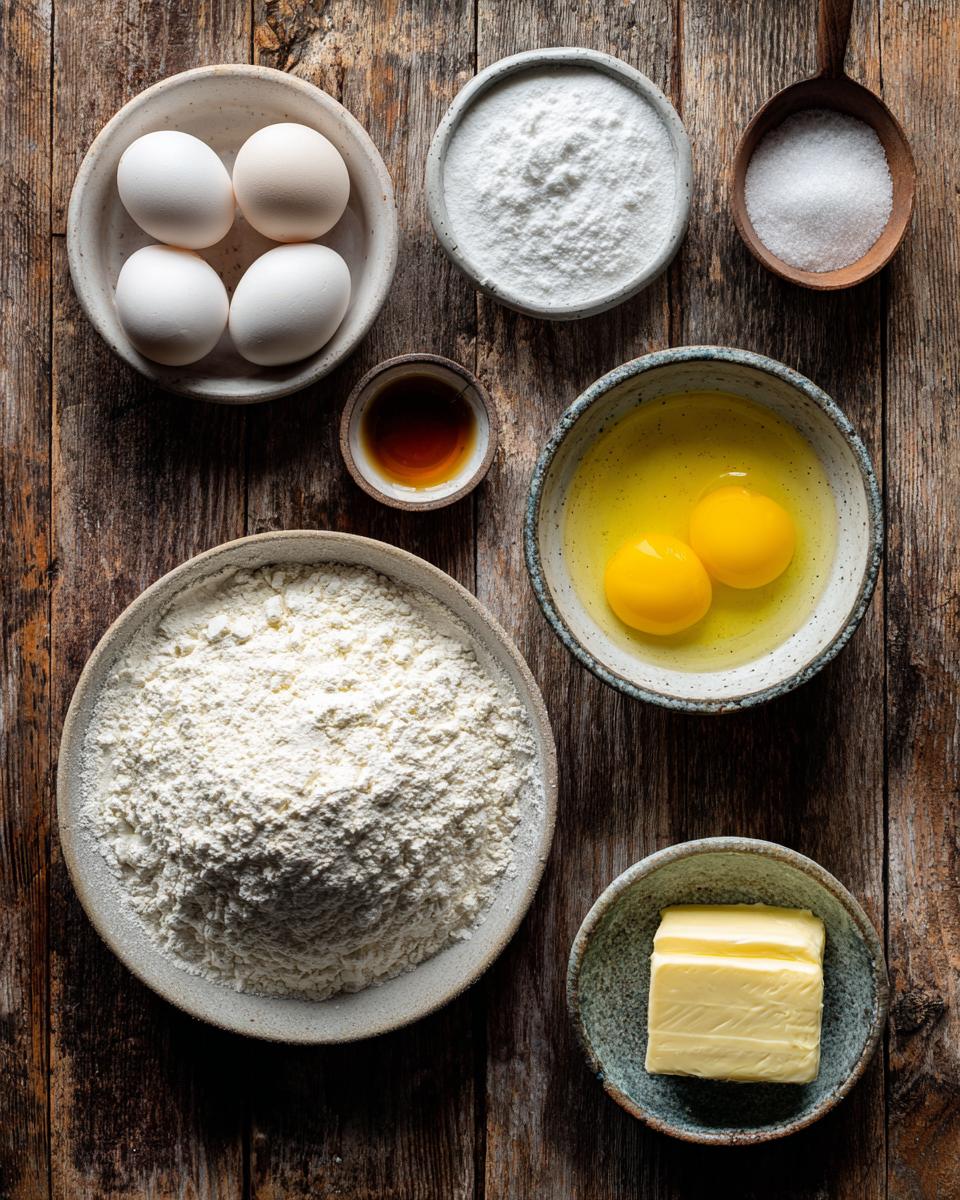
The beauty of these Pizzelle lies in their simplicity, but don’t let that fool you – each ingredient plays a vital role in achieving that signature crispness and delicate flavor. I’ve found that using quality ingredients makes all the difference, transforming a good cookie into an absolutely unforgettable one. We’re not looking for anything exotic here, just fresh, standard pantry staples ready to be transformed into something truly special.
Wet Ingredients for Your Pizzelle
For the wet ingredients, you’ll need three large eggs, which provide structure and richness, and half a cup of granulated sugar for sweetness. Crucially, we’ll also use half a cup of unsalted butter, melted and slightly cooled. Unsalted is key here, so we can control the salt content ourselves. These combine to form the luscious base of our Pizzelle batter.
Dry Ingredients for Your Pizzelle
Our dry team consists of one and three-quarter cups of all-purpose flour, which gives the Pizzelle their body and tender crumb. Alongside that, we’ll add one and a half teaspoons of baking powder. This little leavening agent is what helps give our Pizzelle that slight puff and ensures they cook up light and airy, perfectly crisp without being brittle.
Flavoring Your Pizzelle
Now for the fun part: flavor! I always use one teaspoon of good quality vanilla extract – it’s a classic for a reason and really brings out the sweetness. For that traditional Italian touch, I also include half a teaspoon of anise extract. If anise isn’t your thing, you can easily omit it or swap it for another extract like almond. The better the quality of your extracts, the more vibrant the flavor of your Pizzelle will be!
Equipment for Making Pizzelle
While the ingredients are simple, having the right tools is essential for making perfect Pizzelle. The absolute star of the show is, of course, a good quality pizzelle iron. This specialized waffle iron imprints those beautiful, intricate patterns onto your cookies and cooks them quickly and evenly. You’ll also want a large mixing bowl for the batter, a whisk or electric mixer, measuring cups and spoons for accuracy, and a wire cooling rack. The rack is crucial for allowing air to circulate, ensuring your warm Pizzelle crisp up beautifully as they cool.
How to Make Pizzelle: Step-by-Step Guide
Crafting these delightful Pizzelle is a truly rewarding experience, and with a little guidance, you’ll be turning out perfect batches in no time. The key to achieving that signature delicate crispness and beautiful pattern lies in understanding each step, especially the mixing and cooking process. Don’t worry, I’ll walk you through it, anticipating any little bumps along the way so your Pizzelle turn out absolutely flawless. We’re aiming for that golden-brown perfection, crisp to the bite, and full of flavor. Follow these steps, and you’ll master the art of making Pizzelle.
Preparing Your Pizzelle Batter
First things first, let’s get that batter just right for your Pizzelle. In a large bowl, whisk together your eggs and sugar until the mixture is light and fluffy – a hand mixer makes this quick work, but a good arm and a whisk will do! Next, gently stir in your melted butter, vanilla extract, and the anise extract if you’re using it. In a separate bowl, combine the all-purpose flour and baking powder. Now, gradually add the dry ingredients to the wet, mixing until just combined. The crucial part here is to not overmix; overmixing develops gluten, which can lead to tough Pizzelle instead of tender ones. A few small lumps are perfectly fine!
Cooking Your Pizzelle to Golden Perfection
This is where the magic happens! Preheat your pizzelle iron according to the manufacturer’s instructions – usually, it takes about 5-10 minutes. Once hot, drop about 1 tablespoon of batter onto the center of each grid. The exact amount might vary slightly depending on your iron, so you might need to do a test run. Close the iron and cook for 30-60 seconds. The cooking time for Pizzelle is a bit of an art; you’re looking for a beautiful golden-brown color. Don’t rush it, but don’t let them burn! Once they’re the perfect shade, carefully remove the hot Pizzelle from the iron using a thin spatula or a chopstick. They’ll be pliable at this stage.
Cooling and Storing Your Pizzelle
Immediately after removing your Pizzelle from the iron, transfer them to a wire rack to cool completely. This step is absolutely critical for achieving that wonderful crisp texture. As they cool, the moisture evaporates, and they’ll firm up beautifully. If you want to shape them into cones or cups, you’ll need to do it while they’re still warm and pliable, right after taking them off the iron. Once your Pizzelle are completely cool and crisp, store them in an airtight container at room temperature. This will keep them fresh and crunchy for several days, though I doubt they’ll last that long!
Pizzelle Variations and Serving Suggestions
Once you’ve mastered the classic Pizzelle, feel free to get creative! For a different flavor profile, swap the anise extract for almond extract, lemon zest, or even a dash of cocoa powder in the batter. You can also dust the cooled Pizzelle with powdered sugar, cinnamon sugar, or drizzle them with melted chocolate for an extra touch of elegance. While still warm and pliable from the iron, quickly roll them into cones or drape them over a wooden dowel to create elegant cups – perfect for holding scoops of ice cream, fresh berries, or a dollop of whipped cream. They’re also delightful simply dipped in coffee or hot chocolate, making them a versatile treat for any occasion.
Common Questions About Pizzelle
I get a lot of questions about Pizzelle, especially from those new to making these delightful Italian cookies. It’s totally normal to wonder about the best practices, so I’ve gathered some common questions and my answers to help you along your baking journey. These tips will ensure your Pizzelle turn out perfectly every time, from troubleshooting to delicious variations.
Can I make Pizzelle without a pizzelle iron?
Unfortunately, no. A pizzelle iron is essential for making traditional Pizzelle. It creates their characteristic flat, thin shape and intricate waffle pattern. Without it, you’d end up with thin pancakes, not true Pizzelle.
How do I store leftover Pizzelle?
Once your Pizzelle are completely cooled and crisp, store them in an airtight container at room temperature. This will keep them fresh and crunchy for up to two weeks. Avoid refrigerating, as it can make them soft.
What are some flavor alternatives for Pizzelle?
Beyond vanilla and anise, you can easily customize your Pizzelle! Try almond extract for a nutty flavor, lemon or orange zest for a bright citrusy note, or a touch of cocoa powder for chocolate Pizzelle. Experiment to find your favorite!
Estimated Nutritional Information for Pizzelle
I know many of you are curious about the nutritional breakdown of your favorite treats, so I’ve put together an estimated guide for these Pizzelle. Please remember that these values are approximations and can vary based on specific ingredient brands, exact serving sizes, and any modifications you make to the recipe. Each Pizzelle (one cookie) is estimated to contain around 80 calories, with 4g of fat, 1g of protein, and 10g of carbohydrates. Enjoy in moderation!
Your Feedback on These Delicious Pizzelle
I absolutely adore these Pizzelle, and I’d love to hear how they turn out for you! Please leave a comment below and let me know your favorite flavor variations or serving suggestions. Did you try shaping them into cones? Your ratings and feedback truly help me and other home bakers, so don’t be shy – share your Pizzelle experience!
Print
Thin Pizzelle Cookies
- Total Time: 45 minutes
- Yield: 2-3 dozen cookies 1x
- Diet: Vegetarian
Description
Pizzelle are traditional Italian waffle cookies. They are crisp, delicate, and often flavored with anise or vanilla. These cookies are a classic treat, especially during holidays.
Ingredients
- 3 large eggs
- 1/2 cup granulated sugar
- 1/2 cup unsalted butter, melted
- 1 teaspoon vanilla extract
- 1/2 teaspoon anise extract (optional)
- 1 3/4 cups all-purpose flour
- 1 1/2 teaspoons baking powder
Instructions
- In a large bowl, whisk together the eggs and sugar until light and fluffy.
- Stir in the melted butter, vanilla extract, and anise extract (if using).
- In a separate bowl, combine the flour and baking powder.
- Gradually add the dry ingredients to the wet ingredients, mixing until just combined. Do not overmix.
- Preheat your pizzelle iron according to the manufacturer’s instructions.
- Drop about 1 tablespoon of batter onto the center of each grid on the pizzelle iron.
- Close the iron and cook for 30-60 seconds, or until golden brown.
- Carefully remove the pizzelle from the iron and place them on a wire rack to cool completely. They will crisp as they cool.
- Store pizzelle in an airtight container at room temperature.
Notes
- For a different flavor, try almond extract instead of anise or vanilla.
- Dust cooled pizzelle with powdered sugar before serving.
- Pizzelle can be shaped into cones or cups while still warm to serve with ice cream or fruit.
- Prep Time: 15 minutes
- Cook Time: 30 minutes
- Category: Dessert
- Method: Baking
- Cuisine: Italian
Nutrition
- Serving Size: 1 cookie
- Calories: 80
- Sugar: 5g
- Sodium: 30mg
- Fat: 4g
- Saturated Fat: 2g
- Unsaturated Fat: 2g
- Trans Fat: 0g
- Carbohydrates: 10g
- Fiber: 0g
- Protein: 1g
- Cholesterol: 20mg