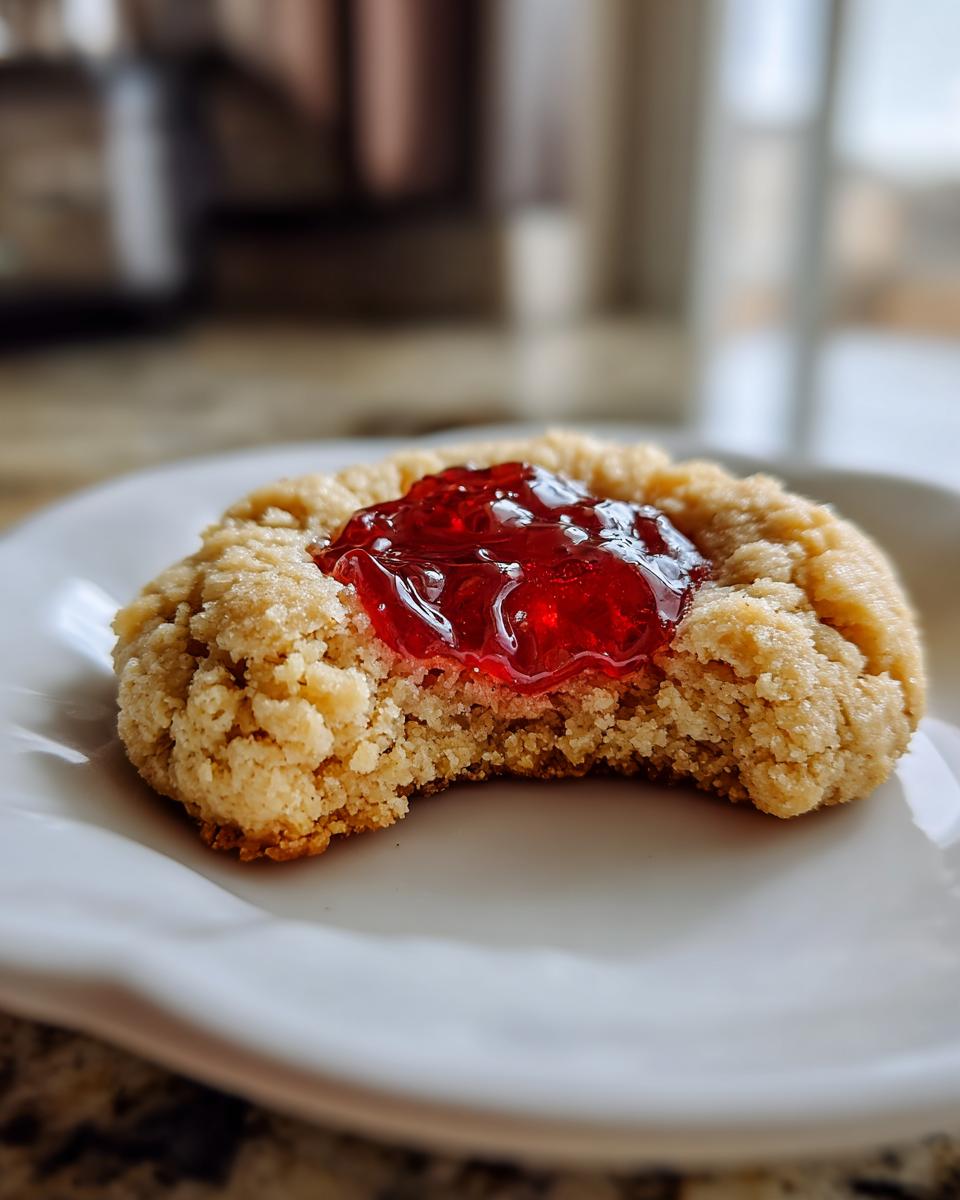
Thumbprint Cookies have been a staple in my baking repertoire since I first discovered the magic of pressing my thumb into soft dough and filling it with sweet, glistening jam. There’s something so incredibly satisfying and whimsical about these little jewels. They transform simple ingredients into something truly special, bringing a smile to everyone’s face, whether it’s a casual afternoon treat or a festive holiday platter. I’ve perfected my recipe over years of joyful experimentation, and I promise you, these buttery, jam-filled delights are not just easy to make, but they’re also wonderfully versatile for any occasion.
Why These Thumbprint Cookies Are a Must-Bake
These Thumbprint Cookies aren’t just another recipe; they’re a delightful experience waiting to happen in your kitchen. I truly believe they’re a must-bake for so many reasons, perfectly balancing simplicity with incredible flavor. You’ll find yourself reaching for this recipe again and again!
- Effortlessly Easy: They come together with minimal fuss, perfect for bakers of all skill levels.
- Irresistibly Delicious: A perfect harmony of buttery shortbread and sweet, fruity jam in every bite.
- Endlessly Versatile: Swap out the jam for any flavor you love, making each batch unique.
- Perfect for Any Occasion: From cozy afternoons to festive holiday gatherings, these Thumbprint Cookies always shine.
The Allure of Homemade Thumbprint Cookies
There’s an undeniable charm to homemade treats, and these Thumbprint Cookies embody that perfectly. The aroma filling your kitchen, the simple act of creating something delicious from scratch – it’s incredibly satisfying. Their classic appeal and comforting taste make them a timeless favorite for a reason.
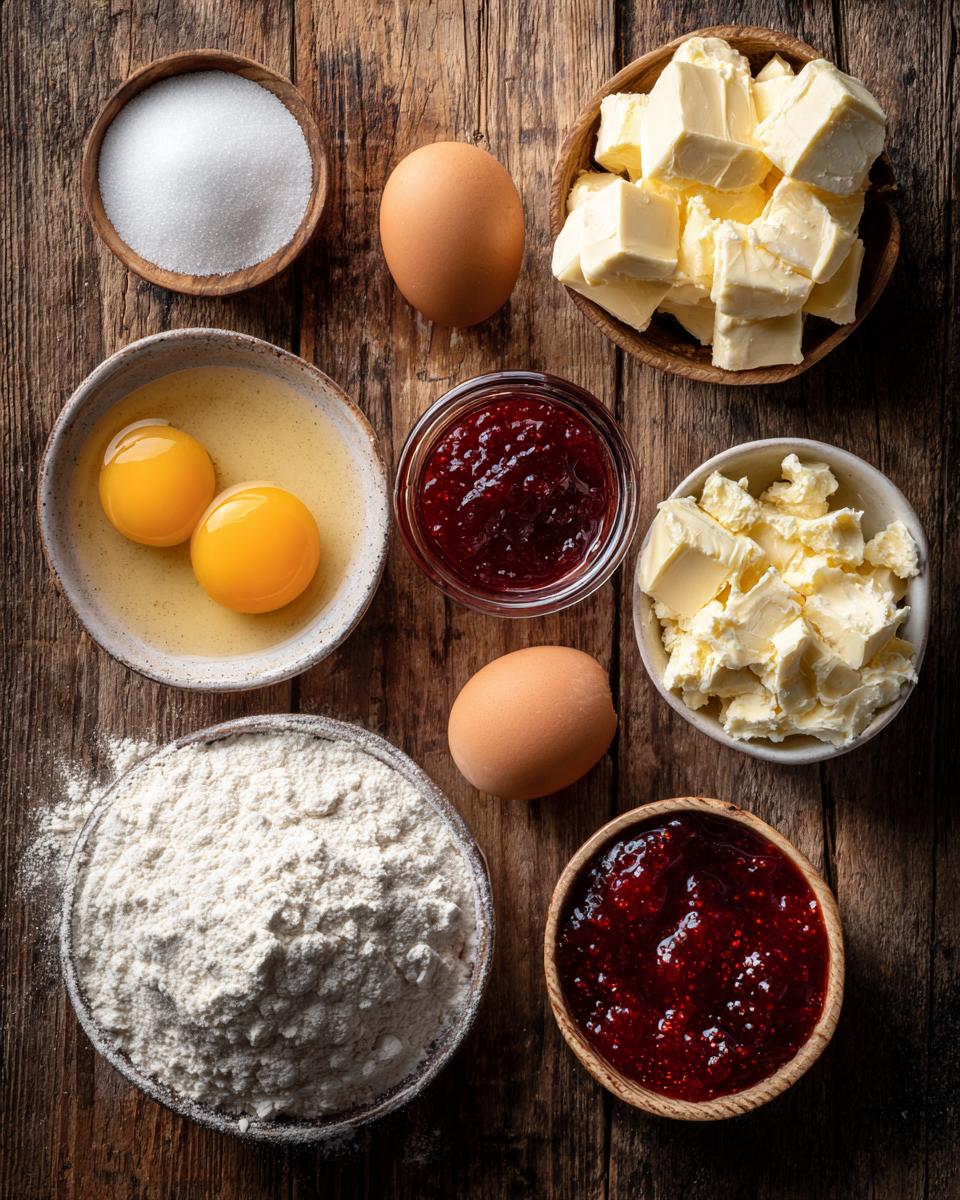
Essential Ingredients for Perfect Thumbprint Cookies
Creating truly delicious Thumbprint Cookies starts with understanding your ingredients. I’ve found that paying attention to the details here makes all the difference in achieving that perfect, melt-in-your-mouth texture and rich flavor. You’ll need 1 cup (2 sticks) of unsalted butter, and this is crucial: it needs to be softened. Not melted, not rock hard from the fridge, but soft enough that your finger leaves an indentation easily. Next up is 1/2 cup of granulated sugar, which provides just the right amount of sweetness without overpowering the jam. For richness and binding, we’re using 2 large egg yolks; separate them carefully from the whites. A full 1 teaspoon of alcohol-free vanilla extract will infuse our cookies with a warm, comforting aroma. For the structure, you’ll need 2 1/4 cups of all-purpose flour, measured correctly, and just 1/4 teaspoon of salt to balance the flavors. Finally, for that signature center, choose about 1/2 cup of your favorite fruit jam – raspberry, apricot, or strawberry are my personal go-tos!
Gathering Your Thumbprint Cookie Essentials
For the very best Thumbprint Cookies, quality ingredients truly sing. I always recommend using a good quality butter; it forms the backbone of these cookies. While I don’t stick to one brand, I look for butter with a higher fat content. Fresh large eggs also make a difference. And don’t skimp on the jam; a flavorful, slightly tart jam will provide a beautiful contrast to the sweet cookie base.
How to Make Irresistible Thumbprint Cookies
Now for the fun part: bringing all those wonderful ingredients together to create your very own batch of irresistible Thumbprint Cookies! I’ve broken down the process into clear, manageable steps, so you can follow along with confidence. Don’t rush these steps, especially the mixing and shaping; patience in the kitchen always pays off with delicious results. You’ll be amazed at how simple it is to achieve bakery-quality cookies right in your own home. Let’s get baking those perfect Thumbprint Cookies!
Preparing Your Dough for Thumbprint Cookies
First, preheat your oven to 350°F (175°C) and line your baking sheets with parchment paper – this makes for easy cleanup and prevents sticking. In a large bowl, combine your softened butter and granulated sugar. Cream them together with an electric mixer on medium speed until the mixture is light, fluffy, and pale yellow, usually about 2-3 minutes. This step incorporates air, which is key for tender Thumbprint Cookies. Next, beat in the egg yolks one at a time, followed by the alcohol-free vanilla extract, mixing until everything is well combined and smooth. In a separate, smaller bowl, whisk together the flour and salt. Gradually add these dry ingredients to your wet mixture, mixing on low speed until just combined. Stop as soon as no dry streaks of flour remain; overmixing develops gluten and can make your Thumbprint Cookies tough.
Shaping and Filling Your Thumbprint Cookies
Once your dough is ready, it’s time to shape your Thumbprint Cookies. Take small portions of dough, about 1 tablespoon each, and roll them gently between your palms to form smooth, 1-inch balls. Place these dough balls about 2 inches apart on your prepared baking sheets. Now for the signature indentation! Using your thumb (or the back of a small, round measuring spoon for a more uniform look), make a gentle but firm indentation in the center of each cookie. Be careful not to press all the way through to the baking sheet. Finally, spoon about 1/2 teaspoon of your chosen jam into each indentation. Don’t overfill, or the jam might bubble over during baking.
Baking and Cooling Your Thumbprint Cookies
Carefully transfer your baking sheets to the preheated oven. Bake for 12-15 minutes, or until the edges of the Thumbprint Cookies are lightly golden. Keep an eye on them; ovens vary! Once baked, remove the sheets from the oven and let the cookies cool on the baking sheets for about 5 minutes. This allows them to firm up slightly. Then, gently transfer them to a wire rack to cool completely. Patience is a virtue here, as cooling ensures your Thumbprint Cookies maintain their shape and texture.
Pro Tips for Amazing Thumbprint Cookies
Achieving truly amazing Thumbprint Cookies goes beyond just following the steps; it involves a few little tricks I’ve picked up over the years. First, dough temperature is key. If your dough becomes too warm and sticky while you’re rolling, pop it back in the fridge for 10-15 minutes. This makes it much easier to handle and prevents your cookies from spreading too much. For indentations, while your thumb works perfectly, I often use a 1/2 teaspoon measuring spoon; it creates a perfectly uniform, deep well that holds the jam beautifully. And speaking of jam, to prevent it from overflowing, don’t fill the indentations completely to the brim before baking. The jam will spread a little as it heats, finding its perfect level in your delicious Thumbprint Cookies.
Customizing Your Thumbprint Cookies
The beauty of Thumbprint Cookies is how easily you can make them your own! While raspberry is a classic, don’t be afraid to experiment with other jam flavors like apricot, blackberry, or even lemon curd for a zesty twist. For extra flair, try rolling the dough balls in finely chopped nuts (like pecans or walnuts) before making the indentation, or sprinkle with a touch of powdered sugar after they’ve cooled completely. These small touches create varied and delightful Thumbprint Cookies experiences.
Common Questions About Thumbprint Cookies
I get a lot of questions about these delightful Thumbprint Cookies, and I’m always happy to share my insights! It’s natural to wonder about the little details that can make a big difference in your baking. Whether you’re troubleshooting a batch or planning ahead, these answers should help you master your Thumbprint Cookies. Let’s tackle some of the most common queries I hear, from preventing spreading to choosing the perfect filling, ensuring your next batch of Thumbprint Cookies is nothing short of perfection.
Can I Freeze Thumbprint Cookies?
Absolutely! You can freeze both baked and unbaked Thumbprint Cookies. For baked cookies, cool them completely, then freeze on a baking sheet until solid. Transfer to an airtight container or freezer bag for up to 3 months. Thaw at room temperature. For unbaked dough balls, freeze them solid on a baking sheet, then transfer to an airtight container. Bake from frozen, adding a few extra minutes to the baking time for your delicious Thumbprint Cookies.
What Jam Works Best for Thumbprint Cookies?
The best jam for Thumbprint Cookies is really a matter of personal preference, but I have a few tips! I find a slightly thicker jam works beautifully, as it’s less likely to bubble over during baking. Seedless raspberry, apricot, or strawberry jams are classic choices for their vibrant color and balanced sweetness. Something with a bit of tartness, like sour cherry, can also provide a wonderful contrast to the buttery cookie. Avoid very watery preserves, as they might make your Thumbprint Cookies soggy.
Storing and Enjoying Your Thumbprint Cookies
Once your Thumbprint Cookies have completely cooled, proper storage is key to keeping them fresh and delicious. I recommend storing them in an airtight container at room temperature. They’ll stay wonderfully soft and flavorful for up to 5 days, though honestly, they rarely last that long in my house! When you’re ready to enjoy them, just grab one (or two!) with your favorite cup of tea or coffee. They’re also fantastic as a sweet ending to any meal, a perfect little bite of joy.
Estimated Nutritional Information for Thumbprint Cookies
Please note that the nutritional information provided for these Thumbprint Cookies is an estimate. Calorie counts and other values can vary significantly based on the specific brands of ingredients used, precise measurements, and any substitutions you might make. This information is intended as a general guide and is not precisely calculated by a certified nutritionist.
Share Your Thumbprint Cookie Creations
I absolutely adore seeing your baking adventures! If you make these Thumbprint Cookies, please come back and leave a comment below to tell me how they turned out. Did you try a new jam flavor? What was your favorite part of making them? Don’t forget to rate the recipe, and if you share your beautiful Thumbprint Cookies on social media, be sure to tag me so I can ooh and aah over your delicious creations!
Print
Thumbprint Cookies with Jam
- Total Time: 35 minutes
- Yield: 24 cookies 1x
- Diet: Vegetarian
Description
These thumbprint cookies are soft, buttery, and filled with your favorite jam. They are simple to make and perfect for any occasion.
Ingredients
- 1 cup (2 sticks) unsalted butter, softened
- 1/2 cup granulated sugar
- 2 large egg yolks
- 1 teaspoon vanilla extract (alcohol-free)
- 2 1/4 cups all-purpose flour
- 1/4 teaspoon salt
- 1/2 cup fruit jam (raspberry, apricot, or strawberry)
Instructions
- Preheat oven to 350°F (175°C). Line baking sheets with parchment paper.
- In a large bowl, cream together the softened butter and granulated sugar until light and fluffy.
- Beat in the egg yolks and vanilla extract until well combined.
- In a separate bowl, whisk together the flour and salt. Gradually add the dry ingredients to the wet ingredients, mixing until just combined. Do not overmix.
- Roll the dough into 1-inch balls and place them on the prepared baking sheets.
- Using your thumb or the back of a small spoon, make an indentation in the center of each cookie.
- Spoon about 1/2 teaspoon of jam into each indentation.
- Bake for 12-15 minutes, or until the edges are lightly golden.
- Remove from the oven and let cool on the baking sheets for a few minutes before transferring to a wire rack to cool completely.
Notes
- You can use any flavor of jam you prefer.
- For a festive touch, sprinkle with powdered sugar after cooling.
- Store cookies in an airtight container at room temperature for up to 5 days.
- Prep Time: 20 minutes
- Cook Time: 15 minutes
- Category: Dessert
- Method: Baking
- Cuisine: American
Nutrition
- Serving Size: 1 cookie
- Calories: 150
- Sugar: 10g
- Sodium: 30mg
- Fat: 8g
- Saturated Fat: 5g
- Unsaturated Fat: 3g
- Trans Fat: 0g
- Carbohydrates: 18g
- Fiber: 0.5g
- Protein: 2g
- Cholesterol: 30mg