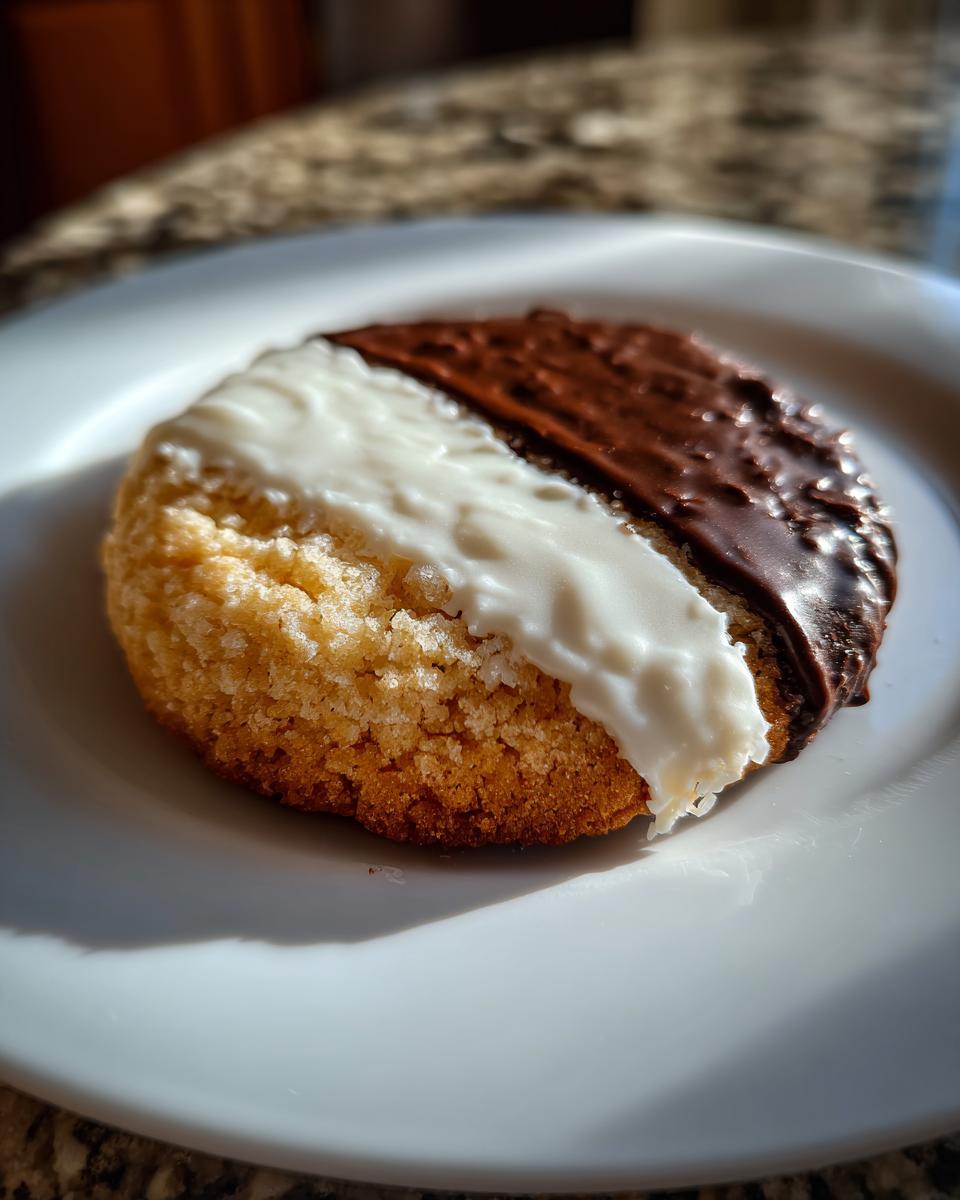
Black and White Cookies have been a personal obsession of mine ever since my first trip to New York City. I’ll never forget walking into a bustling bakery, the air thick with the scent of sugar and butter, and spotting these magnificent, half-vanilla, half-chocolate beauties staring back at me from behind the glass. It was love at first sight, and certainly at first bite! Their classic appeal isn’t just about the striking visual contrast; it’s about that perfectly soft, cake-like texture that melts in your mouth, complemented by the distinct, sweet vanilla and rich chocolate icings. Over the years, I’ve baked countless batches, refining my recipe to capture that authentic, beloved taste. Trust me, these aren’t just cookies; they’re a little slice of bakery heaven you can make right in your own kitchen.
Why You’ll Love These Black and White Cookies
You’re going to adore these homemade Black and White Cookies for so many reasons! They offer that perfect soft, cake-like texture that’s simply irresistible. The classic flavor, a delightful interplay of vanilla and chocolate, is pure comfort. Plus, making them yourself is surprisingly easy, leading to a truly rewarding baking experience. Get ready to impress everyone with these iconic treats!
The Allure of Black and White Cookies
There’s an undeniable charm to Black and White Cookies. Their distinct, half-and-half appearance is instantly recognizable and visually appealing, making them a standout on any dessert platter. Beyond the looks, that satisfying blend of sweet vanilla and rich chocolate icing on a tender, cakey cookie base creates a taste that brings a smile to your face every single time.
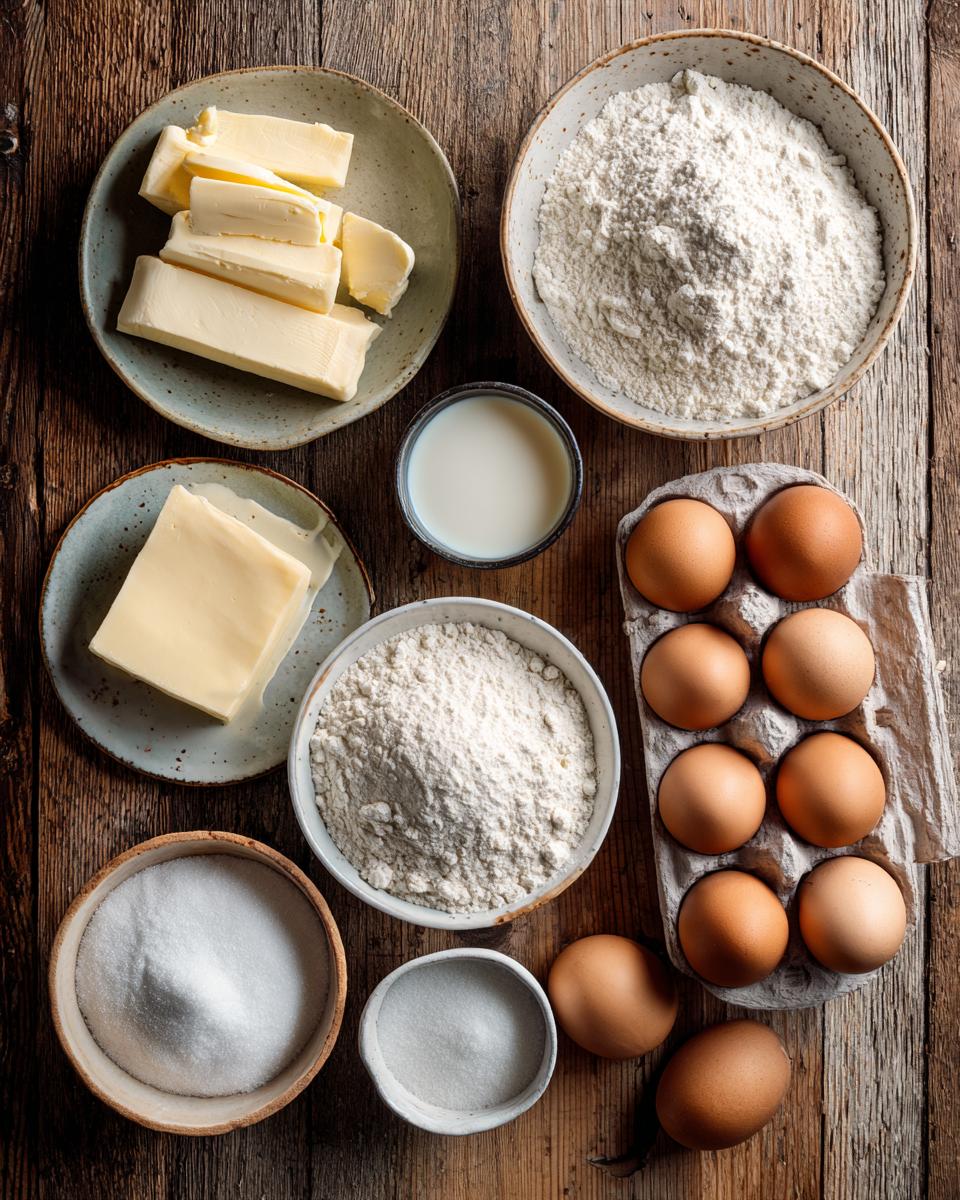
Essential Ingredients for Perfect Black and White Cookies
To create these delightful Black and White Cookies, you’ll need a few pantry staples. For the cookie base, gather 1 cup (2 sticks) of unsalted butter, softened to room temperature, 2 cups of granulated sugar, 4 large eggs, and 1 teaspoon of vanilla extract. You’ll also need 4 cups of all-purpose flour, 1 teaspoon of baking soda, ½ teaspoon of salt, and 1 cup of buttermilk, which is key for that tender crumb. For the iconic two-toned icing, prepare 4 cups of powdered sugar (divided), 4-8 tablespoons of milk (also divided), ½ teaspoon of vanilla extract, and 2 tablespoons of unsweetened cocoa powder. Using fresh, quality ingredients truly makes all the difference!
Cookie Base Ingredients for Black and White Cookies
For the heart of our Black and White Cookies, the dough itself, we rely on softened butter and buttermilk to give us that signature cake-like texture. Eggs add richness and structure, while a blend of flour, baking soda, and salt ensures the perfect rise and flavor balance. It’s all about creating a tender, slightly sweet foundation.
Icing Ingredients for Black and White Cookies
The magic of Black and White Cookies truly comes alive with their distinct icing. Powdered sugar forms the base for both, with milk adjusting consistency. Vanilla extract provides that classic sweet flavor for one half, while unsweetened cocoa powder delivers a rich, dark contrast for the other. Simple ingredients, iconic results!
How to Make Black and White Cookies: Step-by-Step Guide
Making these classic Black and White Cookies is a fun and rewarding process! It all starts with a perfectly balanced dough, followed by careful baking, and finally, the artistic application of the two iconic icings. Don’t rush any of the steps, especially the cooling, and you’ll be enjoying bakery-quality cookies in no time. I’ll walk you through each part, ensuring your cookies turn out beautifully soft, moist, and perfectly adorned.
Preparing the Black and White Cookies Dough
First, preheat your oven to 375°F (190°C) and line your baking sheets with parchment paper. In a large bowl, cream together the softened butter and granulated sugar until the mixture is light and fluffy – this takes a few minutes with an electric mixer. Beat in the eggs one at a time, making sure each is fully incorporated before adding the next, then stir in the vanilla extract. In a separate bowl, whisk together the flour, baking soda, and salt. Now, gradually add the dry ingredients to the wet, alternating with the buttermilk, starting and ending with the dry. Mix just until combined; overmixing will lead to tough cookies!
Baking Your Black and White Cookies
Once your dough is ready, drop rounded tablespoons onto your prepared baking sheets, leaving about 2 inches between each cookie to allow for spreading. Bake for 10-12 minutes, or until the edges are lightly golden and the centers look set. They shouldn’t be heavily browned. Remove them from the oven and let them cool on the baking sheets for a few minutes before carefully transferring them to a wire rack to cool completely. This complete cooling is crucial before icing!
Icing Your Black and White Cookies
Now for the fun part! For the vanilla icing, whisk powdered sugar, milk, and vanilla extract until smooth. For the chocolate, whisk powdered sugar, milk, and cocoa powder. Adjust milk for desired consistency – it should be thick enough to spread but not too stiff. Once your cookies are completely cool, take one and spread half with the vanilla icing and the other half with the chocolate icing. Let the icing set completely before stacking or serving to avoid smudges. Patience here pays off for that perfect, clean line!
Expert Tips for the Best Black and White Cookies
Crafting truly exceptional Black and White Cookies comes down to a few key details. Pay close attention to ingredient temperatures, especially your butter, and avoid the temptation to overmix your dough. Proper cooling is also non-negotiable if you want that picture-perfect, un-smeared icing. I’ve learned these little tricks over countless batches, and they’ll make all the difference in achieving that signature cake-like texture and beautifully set icing.
Achieving the Signature Texture of Black and White Cookies
The secret to that soft, cake-like texture in your Black and White Cookies starts with perfectly softened butter – it should yield to a gentle press but not be melted. Also, resist the urge to overmix the dough once the flour is added. Mix just until combined. This prevents gluten development, keeping your cookies tender, not tough.
Perfecting the Icing on Your Black and White Cookies
For flawless icing, consistency is everything. Aim for a thick, yet spreadable texture; add milk a tiny bit at a time. Apply the icing in a smooth, even layer on completely cooled cookies to prevent melting and bleeding. And remember, patience is key – let that icing set fully before stacking or storing to maintain those crisp, distinct lines!
Black and White Cookies: Frequently Asked Questions
I get a lot of questions about these iconic Black and White Cookies, and I’m happy to share my insights! It’s understandable to want to get them just right, from planning ahead to troubleshooting common issues. Here are some of the most frequent queries I receive to help you master your own batch of these delightful treats.
Can I make Black and White Cookies ahead of time?
Absolutely! You can bake the cookie bases a day in advance and store them unfrosted in an airtight container. The icing can also be made a day ahead and stored in separate airtight containers at room temperature. Just ice them closer to serving for the freshest look and taste of your Black and White Cookies.
How do I store leftover Black and White Cookies?
To keep your Black and White Cookies fresh, store them in an airtight container at room temperature. Layer them with parchment paper to prevent the icing from sticking. They’ll stay wonderfully soft and delicious for up to 3 days. For longer storage, you can freeze them for up to a month.
Why are my Black and White Cookies tough?
Tough Black and White Cookies are usually a sign of overmixing the dough. Once you add the flour, mix only until the ingredients are just combined. Overworking the gluten in the flour can lead to a dense, chewy texture rather than the desired soft, cake-like crumb. Make sure your butter isn’t too cold either!
Estimated Nutritional Information for Black and White Cookies
Please note that the nutritional information provided for these Black and White Cookies is an estimate only. Calorie counts and other values can vary significantly based on the specific brands of ingredients used, precise measurements, and serving sizes. This information is intended for general guidance and is not a substitute for professional nutritional advice.
Share Your Black and White Cookies Experience
I’d love to hear about your adventures with these Black and White Cookies! Please leave a comment below with your thoughts, rate the recipe, or even better, share your beautiful creations on social media and tag me! Do you have a favorite memory tied to these iconic cookies? Let me know!
Print
Black and White Cookies
- Total Time: 42 minutes
- Yield: 24 cookies 1x
- Diet: Vegetarian
Description
These iconic Black and White Cookies are soft, cake-like, and topped with a distinct vanilla and chocolate icing.
Ingredients
- 1 cup (2 sticks) unsalted butter, softened
- 2 cups granulated sugar
- 4 large eggs
- 1 teaspoon vanilla extract
- 4 cups all-purpose flour
- 1 teaspoon baking soda
- 1/2 teaspoon salt
- 1 cup buttermilk
- For the Vanilla Icing:
- 2 cups powdered sugar
- 2–4 tablespoons milk
- 1/2 teaspoon vanilla extract
- For the Chocolate Icing:
- 2 cups powdered sugar
- 2–4 tablespoons milk
- 2 tablespoons unsweetened cocoa powder
Instructions
- Preheat oven to 375°F (190°C). Line baking sheets with parchment paper.
- In a large bowl, cream together the softened butter and granulated sugar until light and fluffy.
- Beat in the eggs one at a time, then stir in the vanilla extract.
- In a separate medium bowl, whisk together the flour, baking soda, and salt.
- Gradually add the dry ingredients to the wet ingredients, alternating with the buttermilk, starting and ending with the dry ingredients. Mix until just combined.
- Drop rounded tablespoons of dough onto the prepared baking sheets, leaving about 2 inches between each cookie.
- Bake for 10-12 minutes, or until the edges are lightly golden and the centers are set.
- Remove from oven and let cool on the baking sheets for a few minutes before transferring to a wire rack to cool completely.
- For the Vanilla Icing: In a small bowl, whisk together the powdered sugar, milk, and vanilla extract until smooth. Add more milk if needed to reach a spreadable consistency.
- For the Chocolate Icing: In another small bowl, whisk together the powdered sugar, milk, and cocoa powder until smooth. Add more milk if needed to reach a spreadable consistency.
- Once cookies are completely cool, spread half of each cookie with vanilla icing and the other half with chocolate icing.
- Let the icing set completely before serving or storing.
Notes
- Ensure your butter is truly softened for a smooth dough.
- Do not overmix the dough, as this can result in tough cookies.
- Cool cookies completely before icing to prevent the icing from melting.
- Store leftover cookies in an airtight container at room temperature for up to 3 days.
- Prep Time: 30 minutes
- Cook Time: 12 minutes
- Category: Dessert
- Method: Baking
- Cuisine: American
Nutrition
- Serving Size: 1 cookie
- Calories: 250
- Sugar: 30g
- Sodium: 120mg
- Fat: 10g
- Saturated Fat: 6g
- Unsaturated Fat: 3g
- Trans Fat: 0.1g
- Carbohydrates: 40g
- Fiber: 1g
- Protein: 3g
- Cholesterol: 40mg