Classic Chocolate Chip Cookies have always held a special place in my heart, and honestly, who can resist that perfect combination of chewy, soft, and chocolatey goodness? For me, these cookies aren’t just a dessert; they’re a memory. I remember baking my first batch with my grandmother, her hands guiding mine as we mixed the dough. That day sparked a lifelong love for baking, and I’ve spent countless hours in my kitchen perfecting this recipe, ensuring it lives up to those cherished memories.
Over the years, I’ve experimented with dozens of variations, but I always come back to this foundational recipe. It’s the one that consistently delivers those iconic golden edges, a delightfully gooey center, and just the right amount of sweetness. Trust me, after many trials and errors, this recipe is a tried-and-true winner that I’m so excited to share with you all!
Why You’ll Love These Classic Chocolate Chip Cookies
These Classic Chocolate Chip Cookies aren’t just any cookies; they’re a little bite of happiness! You’ll adore them because they’re incredibly easy to make, even for beginner bakers, and deliver on that nostalgic, comforting flavor everyone craves. They strike the perfect balance between crispy edges and a delightfully soft, chewy center, making them universally appealing.
The Irresistible Charm of Classic Chocolate Chip Cookies
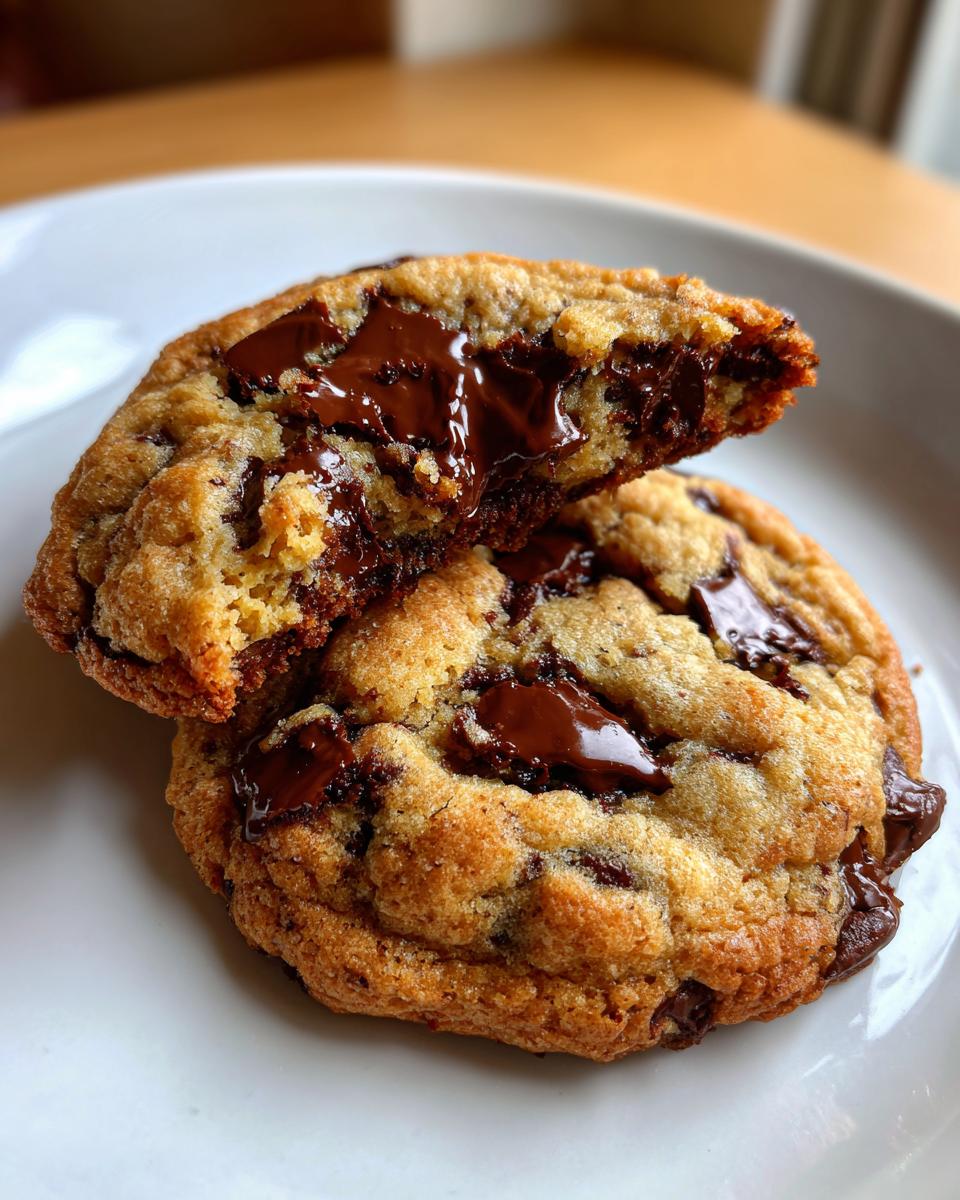
There’s something magical about the aroma of freshly baked Classic Chocolate Chip Cookies filling your home. Each bite offers a comforting warmth, the satisfying crackle of the edge giving way to a rich, molten chocolate explosion. It’s pure comfort food that brings smiles and happy memories with every single cookie.
Essential Equipment for Perfect Classic Chocolate Chip Cookies
Making truly perfect Classic Chocolate Chip Cookies doesn’t require a professional kitchen, but having the right tools makes all the difference! These essential pieces of equipment ensure your baking process is smooth and your cookies turn out beautifully every time, with consistent results and minimal fuss.
Tools for Baking Classic Chocolate Chip Cookies
- Large Mixing Bowls: You’ll need at least two – one for wet ingredients and one for dry, making mixing much cleaner.
- Electric Mixer (stand or hand-held): Crucial for creaming butter and sugars until light and fluffy, creating that perfect cookie texture.
- Measuring Cups and Spoons: Accuracy in baking is key, so precise measurements are a must.
- Rubber Spatula: Ideal for scraping down the sides of the bowl and gently folding in chocolate chips without overmixing.
- Baking Sheets: Sturdy sheets ensure even heat distribution for consistently baked cookies.
- Parchment Paper: Prevents sticking, makes cleanup a breeze, and helps cookies bake evenly.
- Wire Cooling Rack: Allows air to circulate around the cookies, preventing them from getting soggy on the bottom.
Ingredients for Classic Chocolate Chip Cookies
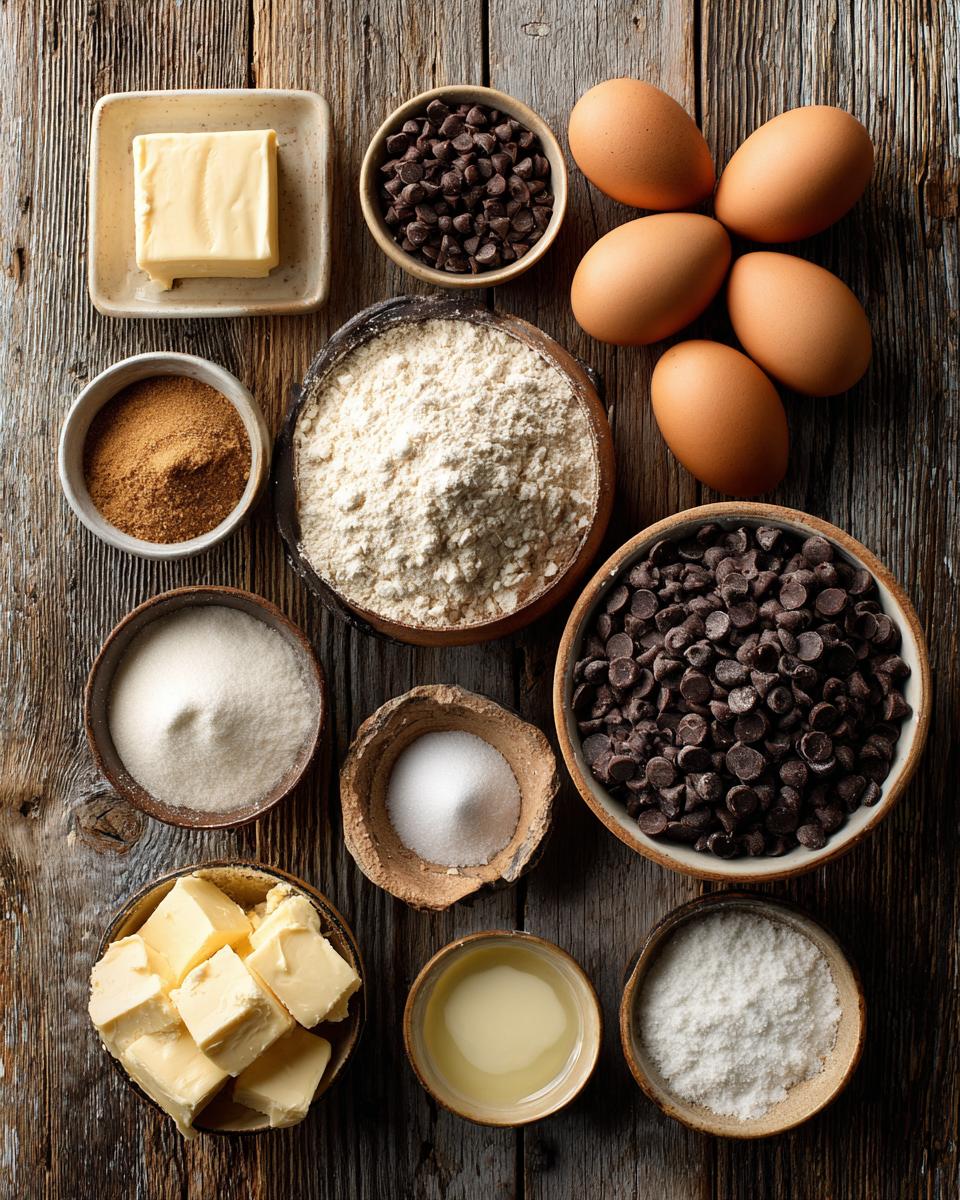
To make my favorite Classic Chocolate Chip Cookies, you’ll need just a few simple, high-quality ingredients. First, grab 1 cup (which is two sticks) of unsalted butter, making sure it’s properly softened to room temperature. You’ll also need 3/4 cup of granulated sugar and 3/4 cup of packed light brown sugar—that packed measurement is important for moisture! For the binders and richness, have two large eggs ready, along with 1 teaspoon of alcohol-free vanilla extract. For the dry elements, measure out 2 1/4 cups of all-purpose flour, 1 teaspoon of baking soda to help them rise, and 1/2 teaspoon of salt to balance all that sweetness. And, of course, the star of the show: 1 1/2 cups of your favorite semi-sweet chocolate chips.
Understanding Your Classic Chocolate Chip Cookie Ingredients
Each ingredient in these Classic Chocolate Chip Cookies plays a vital role. Softened butter and brown sugar are key for that signature chewy texture; the brown sugar also adds a lovely molasses flavor. The baking soda helps them spread and get those slightly crisp edges, while the salt enhances all the other flavors. As for the chocolate chips, semi-sweet is my go-to, but you could easily swap them for milk chocolate for a sweeter cookie, or even a mix of dark and white chocolate for a more complex flavor profile. Just be sure not to skimp on quality; good ingredients make for great cookies!
How to Make Classic Chocolate Chip Cookies
Making Classic Chocolate Chip Cookies is a joyful process, and I’m going to walk you through each step to ensure your batch turns out absolutely perfect. The key is to follow the instructions carefully, but don’t be afraid to have a little fun with it! We’ll start with preheating your oven, then move onto mixing the dough to perfection, and finally, baking them until they’re golden and gooey. Pay close attention to the mixing and baking times; they’re crucial for achieving that ideal chewy-crispy balance we all love. Getting your ingredients ready beforehand, often called “mise en place,” will make the whole process much smoother and more enjoyable. Let’s get baking!
Preparing Your Classic Chocolate Chip Cookies Dough
First things first, preheat your oven to 375°F (190°C) and line your baking sheets with parchment paper; this prevents sticking and ensures easy cleanup. In a large bowl, cream together your softened butter, granulated sugar, and light brown sugar until the mixture is light and fluffy. This usually takes about 2-3 minutes with an electric mixer. Next, beat in the two large eggs one at a time, fully incorporating each before adding the next, then stir in the alcohol-free vanilla extract. In a separate bowl, whisk together the all-purpose flour, baking soda, and salt. Gradually add these dry ingredients to your wet mixture, mixing only until just combined. The most common mistake here is overmixing, which can lead to tough cookies, so stop as soon as the flour streaks disappear. Finally, gently fold in your semi-sweet chocolate chips.
Baking and Cooling Your Classic Chocolate Chip Cookies
Now for the best part! Drop rounded tablespoons of your Classic Chocolate Chip Cookies dough onto the prepared baking sheets, leaving about 2 inches between each cookie to allow for spreading. Bake them for 9-11 minutes, or until the edges are beautifully golden brown but the centers still look slightly soft. This soft center is your secret to a chewy cookie! As soon as they come out of the oven, let them cool on the baking sheets for just a few minutes—this helps them set up without becoming too hard. Then, transfer them to a wire rack to cool completely. Enjoy!
Tips for the Best Classic Chocolate Chip Cookies
Making truly exceptional Classic Chocolate Chip Cookies goes beyond just following the recipe; it involves a few insider tricks I’ve picked up over the years. My biggest piece of advice is to trust your instincts and your senses! Don’t overbake them – a slightly underbaked center is the secret to chewiness. Also, don’t skimp on quality ingredients; they truly make a difference in the final flavor. Another critical tip is to allow your butter to soften properly, but not melt, ensuring a perfect emulsion with the sugars for that ideal texture.
Achieving Chewy Classic Chocolate Chip Cookies
If you’re after that iconic chew, here’s my secret: chill the dough! Even 30 minutes in the refrigerator can significantly improve the texture, making your Classic Chocolate Chip Cookies thicker and chewier by preventing them from spreading too quickly. Another trick is to slightly underbake them; when the edges are golden but the centers still look a little soft, pull them out. They’ll continue to cook slightly on the hot baking sheet.
Storing Your Classic Chocolate Chip Cookies
To keep your Classic Chocolate Chip Cookies tasting fresh and delicious for as long as possible, proper storage is key. Once completely cooled, place them in an airtight container at room temperature. For an extra touch, I sometimes add half a slice of bread to the container; it helps keep the cookies soft and moist by transferring its moisture. They’ll stay wonderfully fresh for about 3-4 days this way.
Classic Chocolate Chip Cookies Variations
While my Classic Chocolate Chip Cookies recipe is perfect as is, there are so many fun ways to personalize them! You could swap out half the semi-sweet chips for milk chocolate, dark chocolate, or even white chocolate chips. For an extra layer of flavor, try adding a handful of chopped nuts like walnuts or pecans. A sprinkle of sea salt on top before baking really elevates the sweetness, or you could experiment with different extracts, like almond or peppermint, for a festive twist. Don’t be afraid to get creative!
Frequently Asked Questions About Classic Chocolate Chip Cookies
I get a lot of questions about making Classic Chocolate Chip Cookies, and I love helping fellow bakers troubleshoot! Here are some of the most common queries I hear, along with my best advice to ensure your cookies turn out perfectly every time. These tips will help you master your cookie game and avoid common pitfalls, making your baking experience even more rewarding.
Can I Freeze Classic Chocolate Chip Cookies Dough?
Absolutely, freezing Classic Chocolate Chip Cookies dough is a fantastic time-saver! Just scoop the dough into individual balls, place them on a parchment-lined baking sheet, and freeze until solid. Once frozen, transfer the dough balls to an airtight freezer-safe bag or container. They’ll keep for up to 3 months. When you’re ready to bake, you can bake them directly from frozen, adding a couple of extra minutes to the baking time.
Why Are My Classic Chocolate Chip Cookies Flat?
Flat Classic Chocolate Chip Cookies are a common issue, and usually, it comes down to a few culprits. Your butter might have been too soft or even melted; room temperature is key, not liquid. Also, too much baking soda can cause excessive spread. Ensure your oven temperature is accurate; if it’s too low, the cookies spread before they set. Chilling your dough for at least 30 minutes before baking can also help prevent flatness significantly!
What is the Best Type of Chocolate for Classic Chocolate Chip Cookies?
For Classic Chocolate Chip Cookies, semi-sweet chocolate chips are the traditional choice and my personal favorite for their balanced sweetness. However, “best” is really up to your taste buds! Dark chocolate chunks offer a more intense, less sweet flavor, while milk chocolate chips create a sweeter, creamier cookie. You can even mix different types or use chopped chocolate bars for those beautiful melty puddles. Experiment to find your perfect match!
Estimated Nutritional Information for Classic Chocolate Chip Cookies
For those mindful of their intake, here’s an estimated nutritional breakdown for one of my Classic Chocolate Chip Cookies. Please remember, these values (Calories, Fat, Saturated Fat, Carbohydrates, Sugar, Protein, etc.) are approximations and can vary based on specific ingredient brands and exact portion sizes. This information is provided as a general guide, not as precise dietary advice.
Share Your Classic Chocolate Chip Cookies Experience
I absolutely adore hearing from you all! If you’ve tried my Classic Chocolate Chip Cookies recipe, please come back and share your experience in the comments below. Did you make any fun variations? How did they turn out? Your feedback and ratings mean the world to me and help other home bakers too. Happy baking!
Print
Your Classic Chocolate Chip Cookies
- Total Time: 25 minutes
- Yield: 2 dozen cookies 1x
- Diet: Vegetarian
Description
Classic Chocolate Chip Cookies are a timeless treat, featuring a chewy center, slightly crispy edges, and melty chocolate chips. This recipe delivers the perfect balance of sweet and salty, making them a favorite for all ages.
Ingredients
- 1 cup (2 sticks) unsalted butter, softened
- 3/4 cup granulated sugar
- 3/4 cup packed light brown sugar
- 2 large eggs
- 1 teaspoon vanilla extract
- 2 1/4 cups all-purpose flour
- 1 teaspoon baking soda
- 1/2 teaspoon salt
- 1 1/2 cups semi-sweet chocolate chips
Instructions
- Preheat oven to 375°F (190°C). Line baking sheets with parchment paper.
- In a large bowl, cream together the softened butter, granulated sugar, and brown sugar until light and fluffy.
- Beat in the eggs one at a time, then stir in the vanilla extract.
- In a separate bowl, whisk together the flour, baking soda, and salt.
- Gradually add the dry ingredients to the wet ingredients, mixing until just combined. Do not overmix.
- Fold in the chocolate chips.
- Drop rounded tablespoons of dough onto the prepared baking sheets, spacing them about 2 inches apart.
- Bake for 9-11 minutes, or until the edges are golden brown and the centers are still soft.
- Remove from oven and let cool on the baking sheets for a few minutes before transferring to a wire rack to cool completely.
Notes
- For extra chewy cookies, chill the dough for at least 30 minutes before baking.
- Store cookies in an airtight container at room temperature for up to 3-4 days.
- Dough can be frozen for up to 3 months. Thaw in the refrigerator overnight before baking.
- Prep Time: 15 minutes
- Cook Time: 10 minutes
- Category: Dessert
- Method: Baking
- Cuisine: American
Nutrition
- Serving Size: 1 cookie
- Calories: 200
- Sugar: 18g
- Sodium: 120mg
- Fat: 10g
- Saturated Fat: 6g
- Unsaturated Fat: 3g
- Trans Fat: 0g
- Carbohydrates: 25g
- Fiber: 1g
- Protein: 2g
- Cholesterol: 30mg