Oh my goodness, let me tell you about my absolute go-to weeknight hero – this teriyaki chicken! It’s the kind of dish that makes you feel like a kitchen wizard with minimal effort. Just a handful of ingredients, one pan, and boom – you’ve got this glossy, sweet-savory glaze clinging to juicy chicken. My kids start sniffing the air the second the garlic and ginger hit the pan. The best part? It’s faster than waiting for takeout. I’ve tweaked this teriyaki chicken recipe over years of rushed dinners, and trust me, that sticky, caramelized sauce is pure magic over a pile of steaming rice.
Why You’ll Love This Teriyaki Chicken
Listen, I know you’ve got a million recipes to choose from, but let me tell you why this teriyaki chicken deserves a permanent spot in your dinner rotation:
- Weeknight lifesaver: From fridge to table in under 30 minutes – even faster than waiting for delivery! The sauce comes together while the chicken cooks, and cleanup is just one pan.
- Flavor bomb: That perfect balance of sweet honey, tangy vinegar, and savory soy sauce will have everyone asking for seconds. The garlic and ginger? Chef’s kiss!
- Kid-approved magic: My picky eater actually requests this! The glossy glaze makes even plain chicken exciting, and you can adjust the sweetness to taste.
- Meal prep superstar: Makes amazing leftovers – the flavors get even better overnight. Pack it cold for lunches or reheat for an instant dinner.
Seriously, this recipe has saved me on more “I have no idea what to cook” nights than I can count. And that sticky, caramelized sauce? You’ll be scraping the pan with your spoon – I always do!
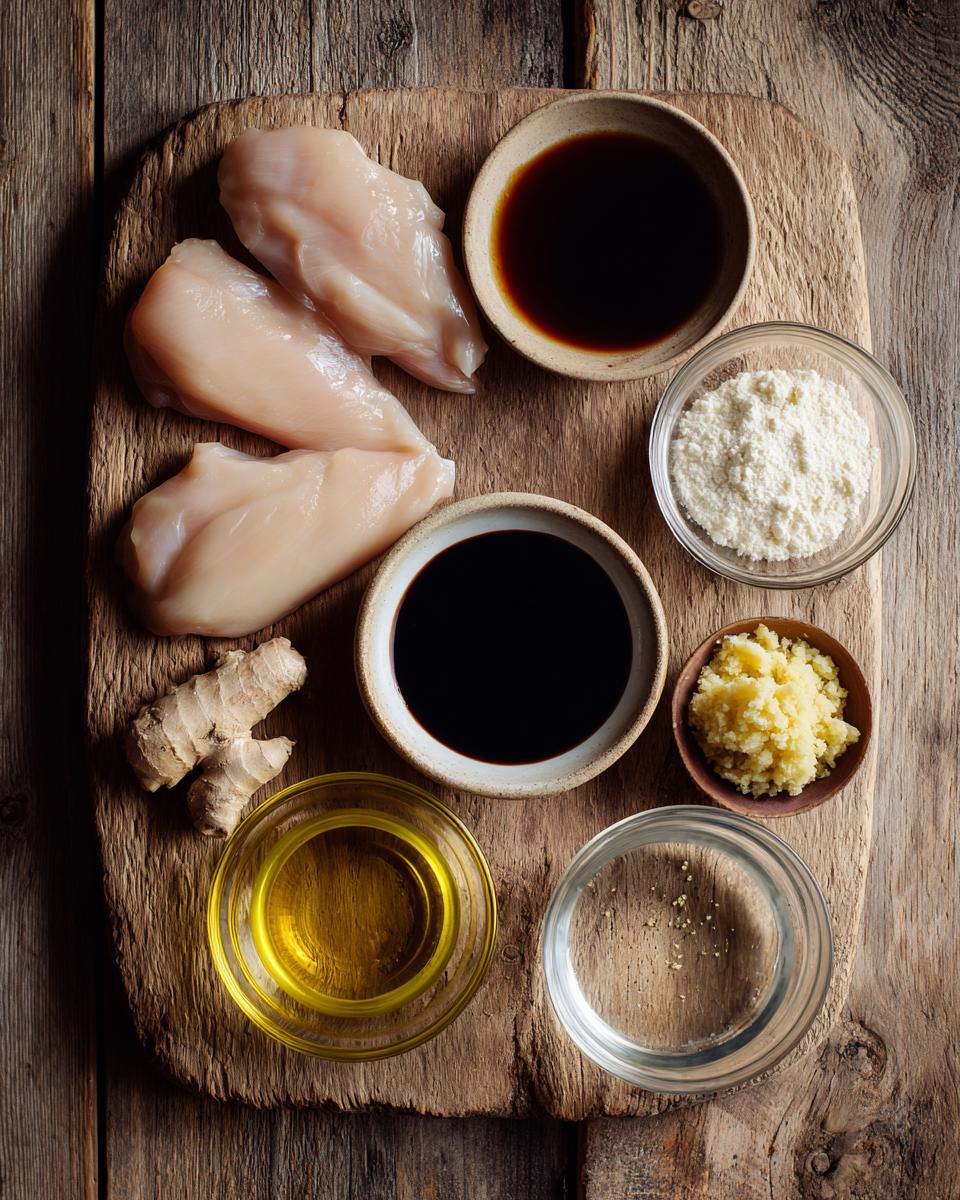
Ingredients for Teriyaki Chicken
Here’s what you’ll need to make the most irresistible teriyaki chicken – I promise every ingredient plays a special role in creating that perfect sticky-sweet glaze we all crave:
- 4 boneless, skinless chicken breasts (about 1.5 lbs) – I like to slice them in half horizontally for quicker cooking
- ½ cup soy sauce – the bold, salty backbone of our sauce (see notes below for low-sodium options)
- ¼ cup honey – packed! This gives us that gorgeous caramelization
- 2 tablespoons rice vinegar – for that essential bright tang
- 1 tablespoon minced garlic – fresh is best, but jarred works in a pinch
- 1 teaspoon grated ginger – I keep peeled ginger in my freezer and grate it straight from frozen
- 1 tablespoon cornstarch – our magical sauce thickener
- 2 tablespoons water – to make the cornstarch slurry
- 1 tablespoon vegetable oil – for that perfect golden sear on the chicken
- 1 teaspoon sesame seeds (optional) – for that pretty finishing touch
- 2 green onions, sliced (optional) – adds fresh crunch and color
Ingredient Notes & Substitutions
Here’s my cheat sheet for when you need to tweak things – because life happens, and we still want teriyaki chicken!
- Soy sauce alternatives: If you’re watching sodium, use low-sodium soy sauce (the flavor will still be great). For gluten-free, coconut aminos work surprisingly well – just add a pinch more honey.
- Honey swaps: Maple syrup gives a similar sweetness, or use brown sugar dissolved in 1 tablespoon of warm water. The flavor changes slightly, but still delicious!
- Cornstarch substitutes: Arrowroot powder works 1:1, or use 2 tablespoons all-purpose flour (mix with cold water first). The sauce won’t get quite as shiny, but it’ll still thicken nicely.
- Vinegar options: No rice vinegar? Apple cider vinegar adds a fruitier note, or use white vinegar cut with a teaspoon of sugar.
- Protein variations: This sauce works miracles on chicken thighs too (just cook 2-3 minutes longer). For beef lovers, thinly sliced flank steak becomes amazing teriyaki beef!
The beauty of this recipe? It’s endlessly adaptable. I’ve made it with what I had in my pantry more times than I can count, and it’s always a hit. The key is balancing that sweet-savory-tangy trio – as long as you’ve got that, you’re golden!
How to Make Teriyaki Chicken
Okay, let’s get cooking! I’ve made this teriyaki chicken at least a hundred times, and I’ve learned a few tricks along the way. The key is nailing that perfect sear on the chicken and letting the sauce reduce into a sticky, glossy masterpiece. Follow these steps, and you’ll have restaurant-quality teriyaki chicken in no time.
Step 1: Prepare the Sauce
First things first – that amazing teriyaki sauce! Grab a medium bowl and throw in the soy sauce, honey, rice vinegar, minced garlic, and grated ginger. Now, whisk it like you mean it – we want everything completely combined. The honey might resist at first (it’s stubborn like that), but keep whisking until the mixture is smooth and the honey dissolves completely. I like to taste it at this point – it should hit you with salty, sweet, and tangy all at once. Too salty? Add a touch more honey. Too sweet? A splash of vinegar. This is your moment to adjust!
Step 2: Cook the Chicken
Heat your oil in a large skillet over medium-high heat – we want it nice and hot. Pat those chicken breasts dry with paper towels (this helps them get that beautiful golden crust). When the oil shimmers, carefully add the chicken. Listen for that glorious sizzle! Don’t touch it for 3-4 minutes – let it develop a gorgeous brown crust. Flip with tongs and repeat on the other side. The chicken won’t be cooked through yet – that’s perfect! We’re just building flavor here before the sauce does its magic.
Step 3: Simmer and Thicken
Now, pour that amazing sauce you made right over the chicken. It’ll bubble up gloriously! Reduce the heat to medium and let it simmer uncovered for 10-12 minutes, flipping the chicken halfway. Meanwhile, mix your cornstarch with water to make a smooth slurry. When there’s about 2 minutes left, drizzle the slurry into the sauce while stirring constantly. Watch the magic happen as it transforms into a glossy, clingy glaze! The sauce should coat the back of a spoon when it’s ready. Remove from heat and let it sit for a minute – it’ll thicken even more as it cools slightly.
Tips for Perfect Teriyaki Chicken
Okay, let me share my hard-earned secrets for teriyaki chicken that’ll make you look like a pro every single time. These little tricks? They’re game-changers.
Dry chicken = golden crust: I can’t stress this enough – pat those chicken breasts dry with paper towels before they hit the pan. Water is the enemy of browning, and we want that gorgeous caramelized crust. I keep a roll of paper towels right by my cutting board just for this step!
Control your heat: That sauce has sugar in it, which means it can go from glossy to burnt in seconds. Medium-high for browning the chicken, then dial it back to medium when the sauce goes in. If it starts bubbling too aggressively, don’t be shy – turn it down! Burnt teriyaki tastes bitter, and we don’t want that.
Taste as you go: Sauce too sweet? Add a splash of vinegar. Too salty? More honey to the rescue. I always do a quick taste test right after mixing the sauce and again before adding the cornstarch. Your perfect balance might be different from mine, and that’s okay!
Let it rest: I know it’s tempting to dive right in, but give your teriyaki chicken a couple minutes off the heat before serving. The sauce will thicken up perfectly as it cools slightly, and the chicken will reabsorb some of those amazing flavors. Trust me, it’s worth the wait!
Serving Suggestions for Teriyaki Chicken
Now comes the best part – piling that gorgeous glazed chicken onto a plate with all the perfect sides! Here’s how I love to serve my teriyaki chicken for maximum deliciousness:
- Steamed white rice – my absolute must-have! The fluffy grains soak up every drop of that sticky sauce. I use my rice cooker, but instant rice works great when I’m in a hurry.
- Crisp-tender veggies – broccoli florets or snap peas steamed just until bright green make the perfect fresh contrast. Sometimes I’ll even toss them right into the teriyaki sauce during the last few minutes of cooking.
- Noodles for fun – when I’m feeling fancy, I swap the rice for udon or soba noodles. The thick sauce clings to every strand beautifully. Pro tip: save some sauce to toss with the noodles separately!
- Quick pickles – a small side of quick-pickled cucumbers (just sliced cukes soaked in rice vinegar with a pinch of sugar) cuts through the richness perfectly.
- Extra garnishes – I always sprinkle on extra green onions and sesame seeds for color and crunch. If I’m feeling extra, some crushed peanuts add amazing texture.
My kids love when I make little teriyaki chicken bowls – rice on the bottom, sliced chicken on top, veggies on the side. It somehow makes dinner feel special, even on a Tuesday night! And don’t even get me started on leftovers – cold teriyaki chicken straight from the fridge might be my favorite midnight snack.
Storing and Reheating Teriyaki Chicken
Oh, the joys of teriyaki chicken leftovers! Honestly? Sometimes I think it tastes even better the next day after all those flavors have really gotten to know each other. Here’s how I keep mine tasting fresh and delicious:
Storing it right: First, let your teriyaki chicken cool just slightly (but don’t leave it out more than 2 hours – food safety first!). Then transfer it to an airtight container – I’m obsessed with my glass ones because they don’t absorb smells. The chicken keeps beautifully for 3-4 days in the fridge. Want to freeze it? Portion it out with some sauce in freezer bags, squeeze out the air, and it’ll be good for 2-3 months.
Reheating magic: Here’s my foolproof method – transfer the chicken and sauce to a skillet with a tablespoon or two of water. Cover and heat over low, stirring occasionally, until warmed through. The water keeps the sauce from getting too thick or the chicken drying out. Microwave works too – just use 50% power and stir every 30 seconds. Always check that it’s piping hot all the way through before serving!
Pro tip: If your sauce thickened too much in the fridge, just whisk in a splash of water or broth while reheating. And those sesame seeds and green onions? Save them for garnish after reheating so they stay fresh and crunchy. My kids actually fight over who gets to sprinkle them on!
Teriyaki Chicken FAQs
I get so many questions about this teriyaki chicken recipe – here are the ones that pop up most often with all my tried-and-true answers!
Can I use chicken thighs instead of breasts?
Absolutely! I actually prefer thighs sometimes – they stay juicier and have more flavor. Just cook them skinless and boneless, and add an extra 2-3 minutes to the simmering time since they’re a bit thicker. The sauce clings to them beautifully!
How can I make this less salty?
Easy fixes! First, use low-sodium soy sauce – it makes a huge difference. You can also swap half the soy sauce for chicken broth, or add 1-2 tablespoons more honey to balance it out. My secret? A splash of pineapple juice cuts the saltiness while adding a nice fruity note.
Can I freeze teriyaki chicken?
Yes! Let it cool completely, then store in freezer bags with all that glorious sauce. Squeeze out excess air and it’ll keep for 2-3 months. Thaw overnight in the fridge, then reheat gently with a splash of water to loosen the sauce. The texture stays perfect!
Why isn’t my sauce thickening?
Two common culprits: either your cornstarch slurry wasn’t mixed well (make sure it’s smooth before adding), or the sauce wasn’t hot enough when you added it. If this happens, just mix another small batch of cornstarch and water and try again – it’ll get there!
Can I make this ahead for meal prep?
One of my favorite meal prep recipes! Cook completely, then divide into containers with rice. It keeps 3-4 days in the fridge – the flavors actually improve. Just add fresh garnishes when you’re ready to eat. The sauce might thicken in the fridge, so stir in a teaspoon of water when reheating.
Nutritional Information
Now, I’m no nutritionist, but I can tell you this – my teriyaki chicken balances flavor and nutrition beautifully! Keep in mind these estimates can vary based on your specific ingredients and brands (especially depending on how much sauce you use – I won’t judge if you spoon extra!).
Each serving (about one chicken breast with sauce) gives you a great protein boost while keeping carbs reasonable. The honey adds natural sweetness, but you’re also getting that immune-boosting garlic and ginger. Soy sauce brings the sodium, which is why I often use the low-sodium variety.
The best part? You control the ingredients. Want lighter? Use less honey and more vinegar. Need more veggies? Toss in some bell peppers or mushrooms while cooking. Cooking should be flexible and fun – that’s why I never stress about exact numbers. Just enjoy your delicious, homemade meal!
Print
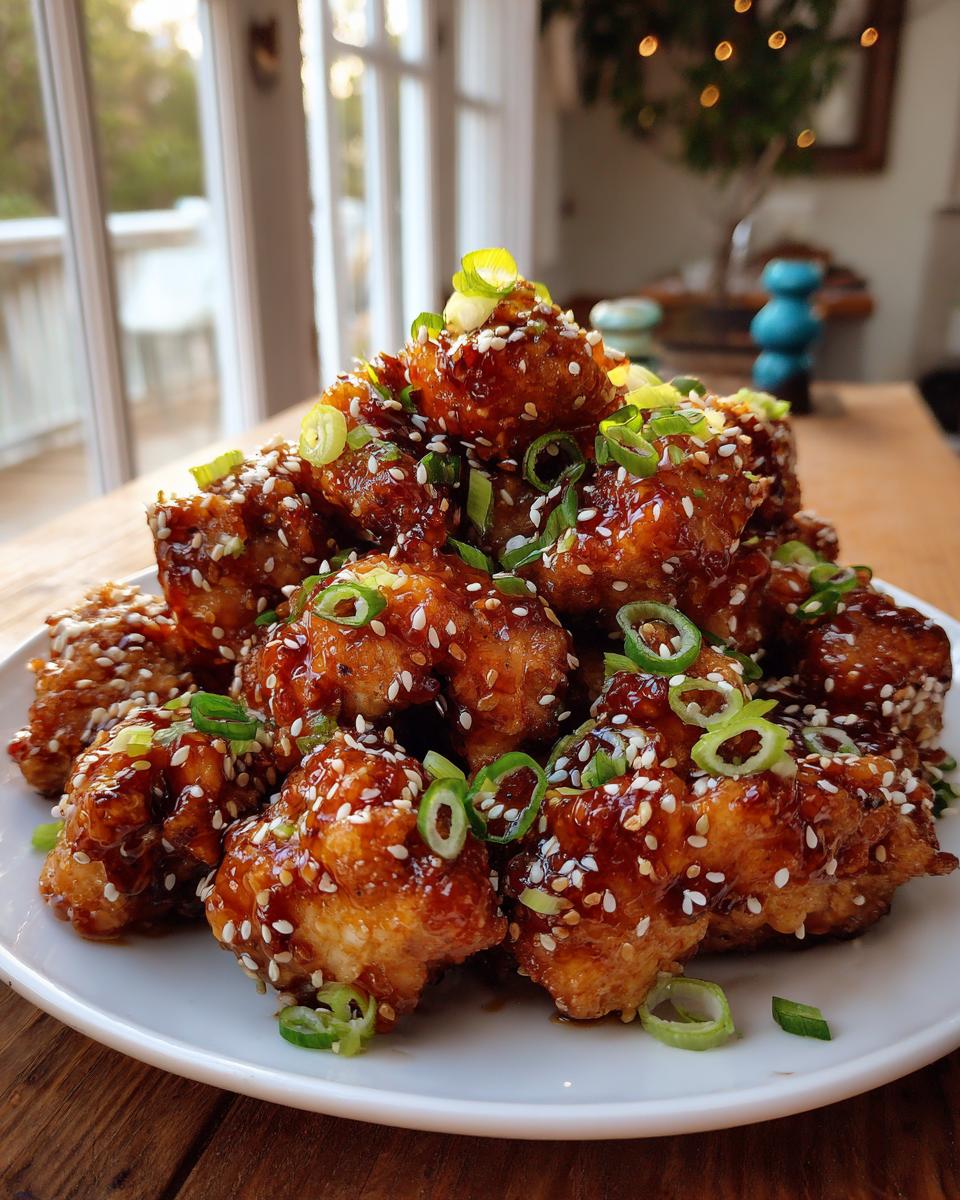
Teriyaki Chicken with Sticky Glaze
- Total Time: 25 mins
- Yield: 4 servings 1x
- Diet: Low Calorie
Description
A simple and flavorful teriyaki chicken dish with a sweet and savory glaze.
Ingredients
- 4 boneless, skinless chicken breasts
- 1/2 cup soy sauce
- 1/4 cup honey
- 2 tablespoons rice vinegar
- 1 tablespoon minced garlic
- 1 teaspoon grated ginger
- 1 tablespoon cornstarch
- 2 tablespoons water
- 1 tablespoon vegetable oil
- 1 teaspoon sesame seeds (optional)
- 2 green onions, sliced (optional)
Instructions
- In a bowl, whisk together soy sauce, honey, rice vinegar, garlic, and ginger.
- Heat oil in a pan over medium-high heat. Cook chicken until browned on both sides.
- Pour the sauce over the chicken and simmer for 10-12 minutes, turning halfway.
- Mix cornstarch and water, then stir into the sauce to thicken it.
- Remove from heat, garnish with sesame seeds and green onions if desired.
Notes
- For a thicker sauce, add more cornstarch.
- If the sauce is too salty, balance with a little more honey.
- Serve with steamed rice or vegetables.
- Prep Time: 10 mins
- Cook Time: 15 mins
- Category: Main Dish
- Method: Stovetop
- Cuisine: Japanese
Nutrition
- Serving Size: 1 chicken breast
- Calories: 280
- Sugar: 15g
- Sodium: 1200mg
- Fat: 6g
- Saturated Fat: 1g
- Unsaturated Fat: 4g
- Trans Fat: 0g
- Carbohydrates: 20g
- Fiber: 1g
- Protein: 35g
- Cholesterol: 85mg