You know that feeling when you bite into something so delicious at a restaurant that you immediately start plotting how to recreate it at home? That’s exactly what happened to me the first time I tried Ruth’s Chris Stuffed Chicken. One forkful of that juicy chicken breast bursting with savory stuffing, and I was hooked!
The best part? It’s shockingly easy to make this gourmet dish in your own kitchen. No fancy chef skills required – just tender chicken breasts stuffed with an irresistible mixture of breadcrumbs, Parmesan, and herbs that bakes up golden and crispy. My version captures everything I love about the original, right down to the way the garlic-infused butter seeps into every bite.
I’ll never forget how impressed my dinner guests were when I served this the first time. “You made THIS?” they kept asking between mouthfuls. Little did they know it comes together faster than ordering takeout!
Why You’ll Love This Mouthwatering Ruth’s Chris Stuffed Chicken
Trust me, once you try this recipe, you’ll understand why it’s become my go-to dish for everything from Tuesday night dinners to fancy dinner parties. Here’s what makes it so special:
Restaurant-quality flavor at home – That first bite transports you right back to Ruth’s Chris with its perfect blend of garlicky, buttery goodness and crispy golden crust. The Parmesan adds this incredible umami depth that makes the stuffing irresistible.
Easier than it looks – Don’t let the fancy presentation fool you! The stuffing comes together in one bowl, and creating the pocket in the chicken takes just seconds. I promise even first-timers can nail this recipe.
Total crowd-pleaser – Whether it’s date night or feeding picky kids, everyone goes crazy for this chicken. My neighbor still talks about the time I brought it over after her surgery – “better than any medicine,” she said!
Versatile for any occasion – Dress it up with roasted asparagus for anniversary dinners or pair with simple mashed potatoes for weeknights. It’s fancy enough to impress but simple enough for regular rotation.
The magic happens when that stuffing soaks up all the chicken juices as it bakes – creating this incredible flavor explosion in every bite. And that crispy top? Absolute perfection. Just wait till you see how golden it gets!
Ingredients for Mouthwatering Ruth’s Chris Stuffed Chicken
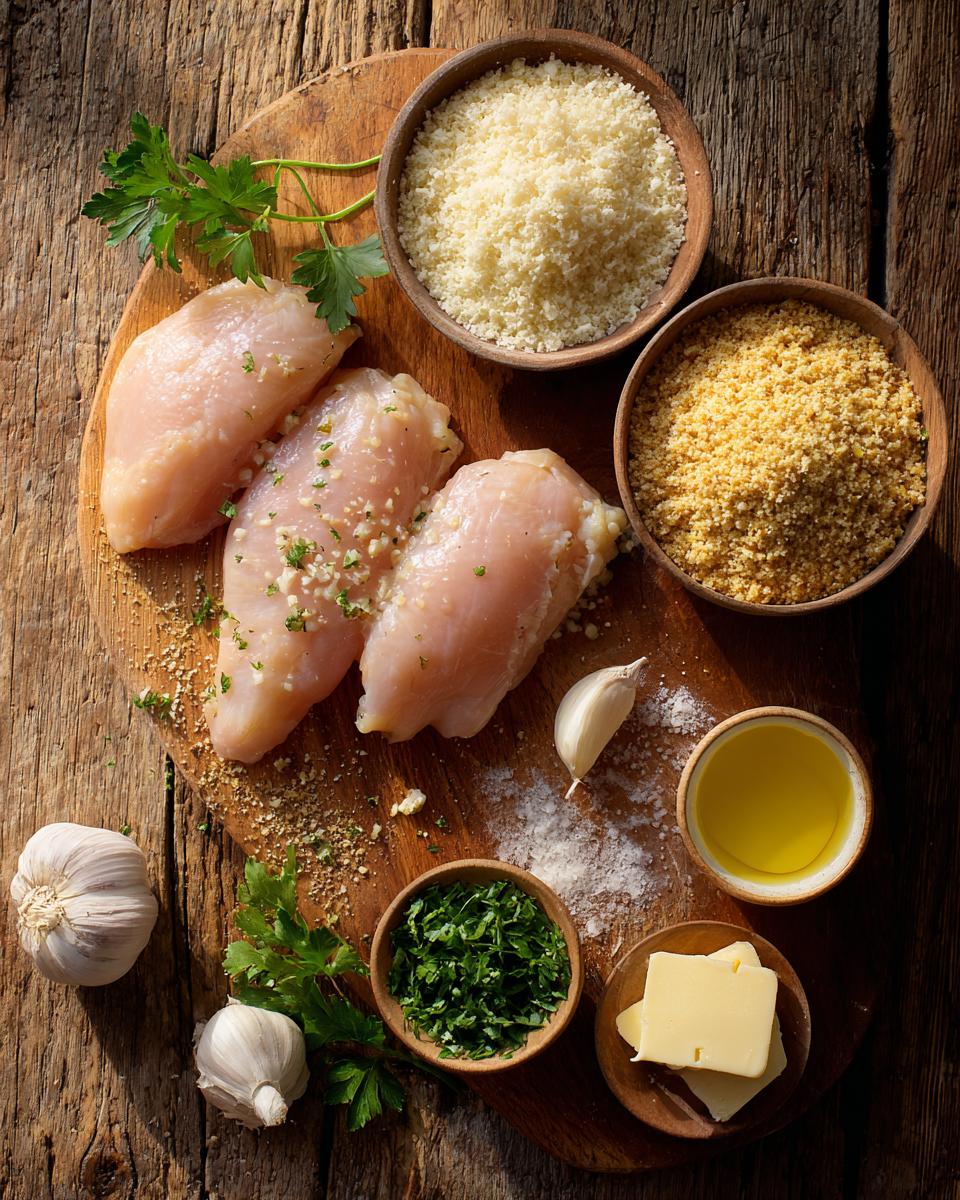
You’ll be shocked how such simple ingredients come together to create something so spectacular. Here’s what you’ll need to make the magic happen (and yes, every single one matters – no skipping the fresh parsley!):
- 4 large boneless, skinless chicken breasts – About 8 ounces each. Bigger is better here so you have plenty of room for stuffing!
- 1 cup breadcrumbs – I use plain, unseasoned so I can control the flavors. Panko works great for extra crunch.
- 1/2 cup freshly grated Parmesan cheese – None of that powdery stuff from a can. The real deal makes ALL the difference.
- 1/4 cup chopped fresh parsley – Measure after chopping. Trust me, dried parsley just won’t give you that bright, herby pop.
- 2 cloves garlic, minced – About 2 teaspoons. And yes, fresh garlic only – no jarred stuff allowed in this recipe!
- 1/4 cup melted butter – I use unsalted, but if you only have salted, just reduce the added salt slightly.
- 1/2 teaspoon salt – Kosher salt is my preference for even seasoning.
- 1/4 teaspoon black pepper – Freshly ground if you’ve got it.
- 1/4 teaspoon paprika – Just a kiss of smoky sweetness to round everything out.
See? Nothing crazy or hard to find. Just good, honest ingredients that, when combined the right way, create absolute magic. I always double check my mise en place before starting – it’s the best way to ensure success!
Equipment Needed
One of the things I love most about this recipe? You probably already have everything you need in your kitchen! Here’s what I grab when making my Ruth’s Chris Stuffed Chicken:
- 9×13 inch baking dish – Glass or ceramic works best. Metal pans can sometimes cause over-browning on the bottom.
- Medium mixing bowl – For combining all that glorious stuffing mixture. I like to use one with a rubber base so it doesn’t slide around while I’m stirring.
- Sharp chef’s knife – Essential for mincing garlic and chopping parsley. Also makes creating those perfect chicken pockets a breeze.
- Wooden toothpicks – About 8-10 should do it. These little guys help keep all that delicious stuffing inside where it belongs!
- Instant-read meat thermometer – Non-negotiable in my book. Takes the guesswork out of knowing when your chicken is perfectly cooked.
- Pastry brush – Optional but handy for brushing any extra butter over the chicken before baking.
That’s it! No fancy gadgets required. Though I will say – if you don’t have a meat thermometer yet, run don’t walk to get one. It’s the secret weapon for never serving dry chicken again. Mine lives permanently in my utensil crock because I use it so often!
Step-by-Step Guide to Perfect Mouthwatering Ruth’s Chris Stuffed Chicken
Okay, here’s where the magic happens! I’ve made this recipe dozens of times, and I’ve learned exactly how to get that perfect balance of juicy chicken and crispy, flavorful stuffing every single time. Follow these steps, and you’ll be amazed at how restaurant-worthy your results will be!
Preparing the Stuffing Mixture
First things first – let’s make that incredible stuffing that makes this dish so special. In your mixing bowl, combine the breadcrumbs, Parmesan, chopped parsley, minced garlic, melted butter, salt, pepper, and paprika. Now here’s my secret – mix it with your hands! Sounds messy, I know, but there’s no better way to make sure every single breadcrumb gets coated with all that garlicky, buttery goodness.
You’ll know it’s ready when you can squeeze a handful and it holds its shape briefly before crumbling apart. If it seems too dry, add another tablespoon of melted butter. Too wet? A sprinkle more breadcrumbs. This perfect consistency means your stuffing will stay put inside the chicken while still getting beautifully crispy on top.
Stuffing the Chicken Breasts
Now for the fun part! Take each chicken breast and lay it flat on your cutting board. Using your sharp knife, make a horizontal cut along the thicker side of the breast to create a pocket. Important safety tip – keep your fingers out of the knife’s path! I hold the chicken steady with one hand while making a shallow initial cut, then carefully deepen it without going all the way through.
Once you’ve got your pocket, spoon about 1/4 cup of stuffing into each breast. Don’t overstuff – you want to be able to seal it closed. If needed, secure with 2-3 toothpicks (count them so you remember how many to remove later!). Arrange the stuffed breasts in your baking dish with the seam side down. Any leftover stuffing? Sprinkle it right on top – bonus crunch!
Baking to Perfection
Pop your stuffed chicken into the preheated 375°F oven and set your timer for 25 minutes. About halfway through, I like to baste the chicken with any juices that have accumulated in the pan. This keeps everything extra moist and flavorful.
When the timer goes off, grab that meat thermometer – this is crucial! Insert it into the thickest part of the chicken (avoiding the stuffing) and look for 165°F. If it’s not quite there yet, give it another 5 minutes and check again. The outside should be golden brown, and the stuffing crispy on top.
Here’s the hardest part – once it’s done, let it rest for 5 full minutes before serving. I know, I know, it smells amazing and you want to dig in, but this waiting period lets the juices redistribute so every bite stays moist and delicious. Worth the wait, I promise!

Expert Tips for Mouthwatering Ruth’s Chris Stuffed Chicken
After making this recipe more times than I can count (much to my family’s delight!), I’ve picked up some game-changing tricks that’ll take your stuffed chicken from great to unforgettable. These are the little secrets that make all the difference!
Fresh is best – I know I sound like a broken record, but please use fresh parsley and garlic! That bright, herby flavor just doesn’t come through the same with dried herbs. And while we’re at it – grate your own Parmesan too. The pre-shredded stuff has anti-caking agents that prevent it from melting properly.
Temperature matters – Let your chicken breasts sit at room temperature for about 15 minutes before stuffing and baking. This helps them cook more evenly so you don’t end up with dry edges and raw centers. Same goes for the butter – melt it but don’t let it get piping hot before mixing.
Resting is non-negotiable – I know I mentioned this earlier, but it’s so important I’m saying it again! Those 5 minutes after baking let the juices settle back into the meat. Cut into it too soon, and all those beautiful juices will just run out onto your plate.
Stuffing alternatives – While the classic breadcrumb mixture is perfection, sometimes I get creative! Try swapping in crumbled goat cheese for half the Parmesan, or add some chopped sun-dried tomatoes for extra tang. Just keep the total volume about the same so your chicken pockets don’t burst.
Toothpick trick – If you’re nervous about the stuffing leaking out, soak your toothpicks in water for 10 minutes before using. This helps prevent them from burning in the oven. And always remember how many you used – nothing ruins a perfect meal like biting into a hidden toothpick!
Leftovers magic – Any extra stuffing mixture? Don’t toss it! Press it into muffin tins and bake alongside the chicken for delicious crispy stuffing bites. My kids fight over these like they’re gold nuggets.
The best tip of all? Have fun with it! Cooking should be joyful, not stressful. Even if your chicken pockets aren’t picture-perfect or some stuffing escapes, it’ll still taste incredible. Trust me, I’ve had my share of messy attempts that turned out absolutely delicious!
Serving Suggestions for Mouthwatering Ruth’s Chris Stuffed Chicken
Now that you’ve mastered this incredible stuffed chicken, let’s talk about what to serve with it! Over the years, I’ve discovered some perfect pairings that make this dish sing. Whether you’re going fancy or keeping it simple, these sides turn your chicken into a complete meal that’ll have everyone asking for seconds.
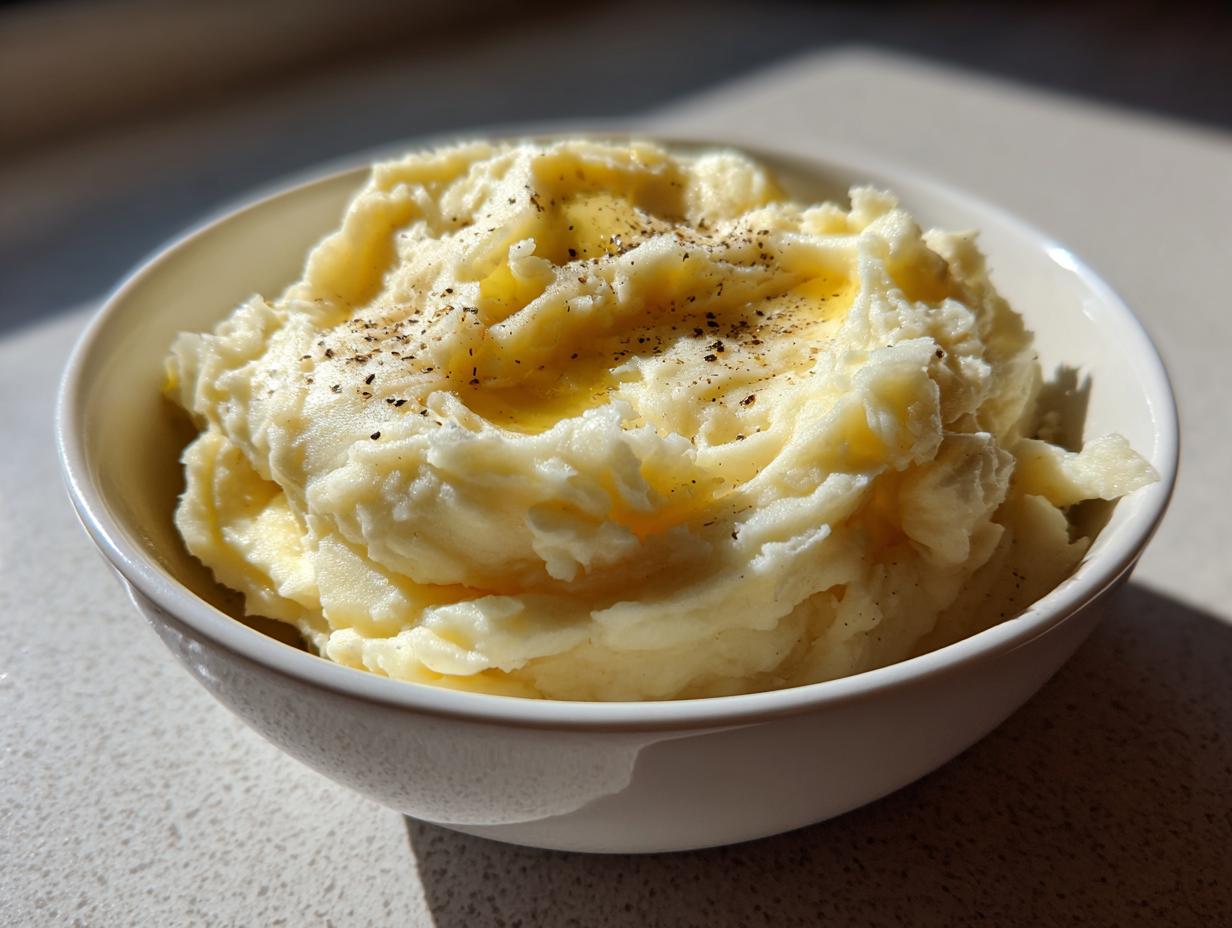
Creamy mashed potatoes – My absolute favorite pairing! Those crispy breadcrumbs and melted cheese from the stuffing create the most amazing gravy when mixed with the chicken juices. I like to make my mashed potatoes extra buttery and slightly lumpy for that perfect rustic texture.
Roasted asparagus – Something about the earthy asparagus balances the richness of the chicken beautifully. Just toss with olive oil, salt, and pepper, then roast at the same temperature as the chicken for about 12 minutes. Squeeze some lemon over top right before serving – wow!
Garlic butter green beans – Quick, easy, and oh-so-flavorful. While the chicken rests, sauté fresh green beans in – you guessed it – more garlic butter! The crisp-tender beans cut through the richness perfectly.
Crusty bread – Non-negotiable in my house! That leftover stuffing mixture makes incredible garlic bread when spread on a baguette and toasted. Plus, you’ll want something to sop up every last bit of those delicious pan juices.
Simple garden salad – When I want something lighter, a crisp salad with vinaigrette balances everything out. My go-to is mixed greens, cherry tomatoes, and thinly sliced red onion with a bright lemon-Dijon dressing.
For special occasions, I’ll go all out with roasted baby potatoes and glazed carrots and sautéed mushrooms. But honestly? Even just the chicken with some steamed rice makes an amazing weeknight dinner. The beauty of this recipe is how versatile it is!
Pro tip: Plate your chicken breast whole first, then slice tableside so everyone gets that perfect view of the gorgeous stuffing inside. Prepare for the oohs and aahs!
Storage and Reheating Instructions
Here’s the good news – this stuffed chicken holds up beautifully as leftovers! But only if you store and reheat it properly. I learned this the hard way after ruining a batch by microwaving it straight from the fridge (dry chicken city, population: me). These foolproof methods will keep your chicken tasting just as amazing as when it first came out of the oven.
Refrigerator storage: Let the chicken cool completely (but don’t leave it out more than 2 hours). Store in an airtight container for up to 3 days. I like to place a paper towel underneath to absorb any excess moisture that might make the breadcrumbs soggy.
Freezing: This recipe freezes surprisingly well! Wrap each cooled chicken breast individually in plastic wrap, then aluminum foil. They’ll keep for up to 2 months. When ready to eat, thaw overnight in the fridge before reheating.
Reheating magic: My secret weapon? The oven! Preheat to 350°F and place the chicken on a baking sheet. Cover loosely with foil and heat for about 15 minutes, or until warmed through. For extra crispiness, remove the foil for the last 5 minutes. If you’re in a pinch, the microwave works too – just place the chicken on a microwave-safe plate, cover with a damp paper towel, and heat in 30-second bursts until warm.
Pro tip: If you froze the chicken with stuffing exposed, sprinkle a little extra Parmesan on top before reheating to revive that golden crust. And whatever you do, don’t skip the resting time after reheating – let it sit for 5 minutes so the juices can redistribute just like the first time around!
Nutritional Information
Okay, let’s talk numbers – but with a big ol’ disclaimer first! These nutrition facts are estimates based on the exact ingredients I use. Your mileage may vary depending on the specific brands and sizes you choose (especially things like chicken breast thickness and Parmesan cheese varieties). That said, here’s the breakdown per serving (1 stuffed chicken breast):
- Calories: 350
- Protein: 35g (Hello, muscle fuel!)
- Carbohydrates: 12g
- Fiber: 1g
- Sugar: 1g
- Fat: 18g
- Saturated Fat: 8g
- Cholesterol: 110mg
- Sodium: 450mg
A few quick notes from my nutritionist friend (who absolutely loves this recipe, by the way): The protein content makes this a fantastic post-workout meal when paired with veggies. If you’re watching sodium, you can reduce the added salt slightly since Parmesan is already salty. And that fat content? Mostly from the butter and cheese – aka the delicious parts that make this taste so incredible!
Remember, these numbers don’t include any sides – so if you’re counting carefully, be sure to account for whatever you serve alongside. Personally, I think the joy this chicken brings is worth every single calorie!
Frequently Asked Questions
Q1. Can I substitute the breadcrumbs with something else?
Absolutely! If you’re out of breadcrumbs or avoiding gluten, crushed pork rinds make an amazing low-carb alternative with great crunch. For a gluten-free option, almond flour works too – just reduce the butter slightly since it absorbs less moisture. My aunt swears by crushed cornflakes for extra crispiness!
Q2. Can I prepare this dish ahead of time?
You sure can! I often stuff the chicken breasts the night before and keep them covered in the fridge. Just add 5-10 minutes to the baking time since they’ll be going in cold. The stuffing mixture also keeps well for 2-3 days in the fridge if you want to prep that in advance.
Q3. What can I use instead of toothpicks?
No toothpicks? No problem! Kitchen twine works beautifully – just tie each breast snugly (but not too tight). For a completely toothpick-free version, you can carefully fold the chicken over the stuffing and bake seam-side down. It might not look as perfect, but it’ll taste just as delicious!
Q4. My chicken breasts are huge/small – how should I adjust cooking time?
Great question! For larger breasts (10+ ounces), I bump the temp to 400°F and bake for 30-35 minutes. Smaller breasts (6 ounces) might only need 20 minutes at 375°F. The meat thermometer is your best friend here – always check for that magic 165°F internal temp regardless of size.
Q5. Can I freeze the stuffed chicken before baking?
Yes! This is one of my favorite freezer meals. Assemble completely, then freeze individually on a baking sheet before transferring to freezer bags. When ready to cook, bake straight from frozen at 375°F for 45-50 minutes. The stuffing might not get quite as crispy, but the flavor will still be fantastic!

Ruth’s Chris Stuffed Chicken
- Total Time: 45 minutes
- Yield: 4 servings 1x
- Diet: Low Lactose
Description
A delicious stuffed chicken dish inspired by Ruth’s Chris Steak House, featuring juicy chicken breasts filled with a savory stuffing.
Ingredients
- 4 boneless, skinless chicken breasts
- 1 cup breadcrumbs
- 1/2 cup grated Parmesan cheese
- 1/4 cup chopped fresh parsley
- 2 cloves garlic, minced
- 1/4 cup melted butter
- 1/2 teaspoon salt
- 1/4 teaspoon black pepper
- 1/4 teaspoon paprika
Instructions
- Preheat your oven to 375°F (190°C).
- In a bowl, mix breadcrumbs, Parmesan, parsley, garlic, melted butter, salt, pepper, and paprika.
- Cut a pocket into each chicken breast.
- Stuff each breast with the breadcrumb mixture.
- Secure with toothpicks if needed.
- Place chicken in a baking dish.
- Bake for 25-30 minutes or until the internal temperature reaches 165°F (74°C).
- Let rest for 5 minutes before serving.
Notes
- Use fresh herbs for the best flavor.
- Check the chicken’s internal temperature to ensure doneness.
- Let the chicken rest before slicing.
- Prep Time: 15 minutes
- Cook Time: 30 minutes
- Category: Main Dish
- Method: Baking
- Cuisine: American
Nutrition
- Serving Size: 1 stuffed chicken breast
- Calories: 350
- Sugar: 1g
- Sodium: 450mg
- Fat: 18g
- Saturated Fat: 8g
- Unsaturated Fat: 8g
- Trans Fat: 0g
- Carbohydrates: 12g
- Fiber: 1g
- Protein: 35g
- Cholesterol: 110mg